Showing posts with label Tutorial. Show all posts

10.2.10

Hello!

Hello ve tüm Türkiye'den yeni okuyucuların hoş geldiniz! Seninle tanışmak memnunluk duyarım. Blog okuma için teşekkür ederiz!

I've been featured on 10Marifet before, for my Beach Vase tutorial, but I wanted to take a minute to say thank you to all of my new readers from Turkey! I've always wanted to make more friends, globally - and I hope I get the chance to soon!(I also hope my Turkish above wasn't too terrible!) Thanks go to 10Marifet for featuring my Cashmere Ruffles Scarf.

Another note entirely - I didn't get the job with Lorna's Laces, which was very sad. Thanks so much to all of you who commented, I really appreciate it!

1.9.08

Gift Tag Tutorial

Gift Tag Tutorial - All Finished!

Lately I've been knitting a lot, so my other crafting has been left on the back-burner, so to speak. I've been focusing on smaller projects that take less time, that I can fit in a few minutes. Paper projects are great for this, because they don't take up too much space to work on, and because let's face it, you can get any color & texture paper you want. Those scrap-booking sections in the big craft retailers are huge!


So, I came up with this super fast and fun gift tag tutorial. It requires a couple sizes of paper punches, but they can be any shape you want (and really, you could do this with scissors & patience, too.)
The hardest part here is deciding which shape and size punches look best together. I was slightly limited by the fact that I only own a handful, but I still think I picked the best coordinating pair.

Gift Tag Tutorial - Materials

Materials:
  • Paper punches in two (or more,) sizes. Can be complimentary or contrasting shapes.
  • Sticker machine, glue stick or double sided tape
  • Hole punch (size is your preference)
  • Coordinating ribbon or twine to attach to package
  • Regular or decorative pens (for names, you can also use rub-on lettering, but I'm not that good with getting it lined up right!)
Large Paper PunchFirst, use the larger punch to create a base. I recommend simpler paper, if you're using the more decorative on top. But really, you can use any paper or card-stock that suits your taste. Here I used simple brown, light weight craft paper.

Small Paper PunchNext, use the smaller punch and a more interestingly patterned paper. It can be contrasting or complimentary, again anything that suits you! I like re-using gift wrap paper for this, I always hate to throw away pretty paper like this!

Sticker Machine + Stickers

Applying Smaller PieceWhen piecing the two together, you can use a sticker machine* to add a thin layer of adhesive to the back of the top paper; or you can use double-sided tape to adhere them. If you're thinking of using glue for this - I'll caution you - don't use too much, or you might get rippling in one or both layers of your tag. You can also use a glue stick for this, it's probably easier to handle than regular glue, anyway!!
*If you're using a sticker machine, I find slightly thicker paper works better than thinner. I've had some rippling issues, and who likes ripply-weird abnormal stickers?!? Hehe.

Holes Punched!To finish, punch a hole through both layers of the tag, and use ribbon or twine to attach it to the package. Add your to: and from: names and you're done! Easy peasy! Here's a couple more examples, and I'd love to see how you use this tutorial!


Gift Tag Tutorial - More FInished Tags

20.9.07

Life's a Beach!

For a while, I've wanted to add more easy project tutorials here - but I've really fallen short of that goal this year. Life gets in the way of our best laid plans, but it's easier to go with the flow than to try and swim against the current, right? With that in mind, I designed these beach candlescapes. They can be used for special occasions, everyday home décor - or just to get a slice of the beach in a busy, busy world. (I'm sure you could do even more with them, and I'd love to see what you guys come up with!)

Materials:
  • Glass container(s)
  • Sand, any desired color
  • Seashells
  • Candle(s)
Start by cleaning your glass container(s,) inside and out. Fill with sand, between 1/5 and 1/3 of the container's height. This is just a guideline, feel free to play around with what makes you happy about your beach! Use as little or as much as pleases you with your container & sand combination.

I knew that I wouldn't have very much extra space around my votive candle, so I used the smallest seashells I had, and placed them around the edge of the container - sort of rocking them into the sand a bit. Once again, play around with the shell sizes and colors that you like most; and don't feel bad if you change your mind later, the materials (except the candle if you've used it up,) can all be reused!

Once you're happy with the placement of the shells, add the candle. I needed to clean my container up at this point, I got fingerprints all over it! LOL If you don't use glass cleaner, a bit of rubbing alcohol on a rag will do the trick, too. Light your candle, being careful not to burn your fingers, and enjoy!

The sand and tall container would also be great as an incense holder. Although, I'm sure you crafty lads & lasses will come up with even more uses, and I'd love to see them!!!

8.5.07

Blythe Doll Bargain Shopping?!?!?!?!

Alright, so first admit that you've jumped into a hobby that can be SUPER expensive. And if you're here to find a deal on a Kenner Blythe, keep searching, because I've yet to find any surefire way of getting a deal on one. Sorry! For those of you looking for the Takara Blythe of your dreams, here's all the tips I've learned! I love a good deal, and know it can be tough to find one on these girls.

Jealous Sisters?!?!?!?

The real reason it's so hard to find Takara Blythe dolls in the US, is because they're not licensed to sell them here. Ashton Drake holds the license here, and so finding a Takara girl (especially a good deal,) can be very tough. Basically you have 2 options; find a US seller who's willing to part with one, or have it shipped internationally. Obviously, international shipping can be expensive, and it can take a long while. Registered airmail can take a few weeks, and impatient mommies should beware (I waited 3 weeks for my first girl, and it seemed like it took twice as long!) Other international services have better delivery times, Express Mail Service from Japan took about 4 days. Domestically shipping will be much quicker, although I have heard some horror stories with both UPS and USPS. I like to always pay for insurance, you never know what can happen in-transit.

So, I can't give you any tips on finding super-duper-30$ deals on Blythe dolls, but I can offer some tips on not spending too much for the girl of your dreams. First off, you'll probably need to think about what doll you'd like to buy. A particular Takara release NRFB (which means never removed from box,) a doll that looks like you, a nude doll for customizing, it's all up to you, and what you like and prefer. I think Flickr is a great resource for anyone looking for Blythe dolls. You can see lots of shots of all sorts of different kinds of dolls, from completely stock, all the way up to completely customized. Keep in mind the older the Takara release is, the harder it will be to find, and probably more expensive for it. Also limited dolls are tougher to come by, and pricier too. One of my wish-list girls is Prima Dolly Melon - limited to 500, I doubt I'll ever afford one, but I did purchase a Prima Dolly to reroot in aqua saran, to be my own personal Melon! LOL

If you're aim is to find a doll on the cheap, you'll need to be flexible. To find the best deal, I'd suggest not being picky about what doll you're purchasing, when you plan to buy her, and where she's coming from. You don't have to buy a doll this way, but it's how I stumbled onto my 55$ girl, and it's how I satiated my Blythe-lust without breaking the bank. LOL (It should be a real word, folks. Once you get hooked, it really is a lusty hobby!) Being flexible in any one of those, or a couple will go far in getting you the doll you want at a price you can afford.

Being patient can also go a long way in not spending too much for a Blythe doll. I've been looking for a Picca Encore or V-smash for a little while, but figure since they're not limited I'll find one when the timing (and financing!) are right for me. Patience can be a tough strategy for Blythe fans, but remember there's new girls out every year, and maybe yours is in the future, instead of the present.

The condition of the doll can play a big part in what you'll pay for her, as well. "Nude" dolls generally cost less because they don't come with the stock outfits & accessories they were originally sold with. "Gently played with" is also another good way of finding a deal. In this case she might come with all stock outfits & accessories, but she has been removed from her box & played with. I should caution every new Blythe Mommy to be careful though, sometimes sellers misrepresent the condition they're doll is in. Colored or dark spots on the bodies, cracks or slices in the faceplate, sand or spray-matting that was done incorrectly, scratches or non-functional eye-mechs can turn into bad dolly deals. The easiest way to avoid this is to ask for lots of pictures, or see the doll in person; but there are plenty of trusted sellers as well (on Ebay and TIB.) Do your homework and read as much as you can about the seller, and Caveat Emptor! Also know for the most part, if you don't bond with your new doll, or don't like her, there's plenty of ways to sell or trade her, to a new mom that will. Anyone have a Prima Dolly Saffy they don't want/need?!?!??? LOL

Any questions? Feel free to ask... I might not know the answer, but I'll try my best!

11.12.06

.:Tree Branch Earrings Tutorial:.

These are made with copper colored craft wire and genuine apatite beads.

whipupI've decided to enter these in this month's Whiplash contest - Gifts & Decoration. I wanted to wait & post pics of the first pair I made, because they're a gift for a special friend; but I didn't want to spoil a Christmas present (it's no fun to know ahead of time!) Good luck to all of the participants, and Happy Holidays, too!

Hand wired tree branch earrings would make a lovely Christmas gift! (Don't worry! They're super easy, and quick too!)

Materials you'll need:
28g wire
Briolette beads, or any kind you'd like
Small jump rings (optional)
Earring wires

Start by cutting a length of wire, between 18" - 24" (go longer if you want longer earrings, shorter if you prefer a more petite size.) Thread the largest bead onto the wire, and pull the 2 ends even. This doesn't have to be perfect.


Hold the wires between your fingers, close to the bead, and twist them together. The goal is to get a nice even twist, but be careful! Twist too much, and you run the risk of snapping one (or both,) of your wires. When you twist the wires together, try and balance them, instead of wrapping one wire around another. Holding the wires in a "V" while you twist will help achieve a balanced twist. This will form the lowest hanging branch.


Next, take another bead (I used increasingly smaller beads, as I wired them, you're working from the bottom towards the top,) and thread it onto one of the wires. It doesn't matter which wire. Move it close to the first bead, and then play with the spacing, until you get a result that pleases you. Pull the loose end back up to the other wire, and hold there.

Twist the second branch into place, remembering not to twist too tightly! I find that odd numbers of branches look more organic than evens, and that asymmetry also makes them feel more branch-like. (Basically, if they're perfect, they won't look like real tree branches, so little irregularities are a good thing!)

The rest of the beads follow the same way, I used smaller beads, and gave them smaller branches each time, to lend a realistic feel. You can wire whatever kind of beads you want, into almost any shape you want.

To finish, I simply twisted about 2 " past how tall I wanted the earrings to be. Bend on a circle shape (I used a double-pointed knitting needle, sz2) and wrap the end around the stem. Clip closely (see below for picture of clipped & bent ends,) and fold the ends as close to the stem as you can, with pliers, if you have them. I added a jump ring to the first pair I made, but it's not a necessity though. Attach to the ear wires, and you're done! Easy peasy, and oh so pretty!

I'd love to hear comments & suggestions, I'd be happy to help if you need it!


Creative Commons License
This work is licensed under a Creative Commons Attribution-NonCommercial-ShareAlike 2.5 License.

13.11.06

.:Bath Bomb Tutorial:.

I must confess that learning how to make bath bombs myself was one of the 2 crafts that got me into blogging (and it's taken me almost 8 months to write this tut!)

I couldn't stand the fact that a lot of upscale sellers charged around 5$ for their bombs - meaning that the bath it was used in, would cost 5$ each! I was absolutely determined to lower that number, of cost per bomb, and didn't mind getting a little (ok, a LOT!) dirty in the process. I'd love to share what I've learned with this immensely wonderful crafting community! (Ok, so this isn't the first bath bomb tut out there, but it's my first attempt at a tutorial, so bear with me please!)

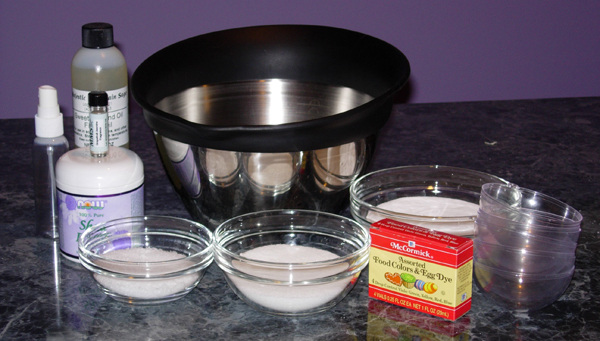
What you'll need…
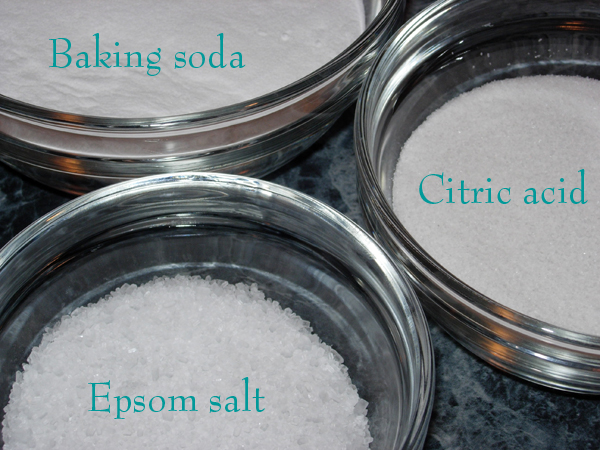
1 cup baking soda
1/2 cup citric acid*
1/3 cup Epsom salts
1 Tbsp Shea butter
1 Tsp Sweet Almond oil
1/2 Tsp fragrance or essential oil
3/4 Tsp water
Food coloring (if desired!)
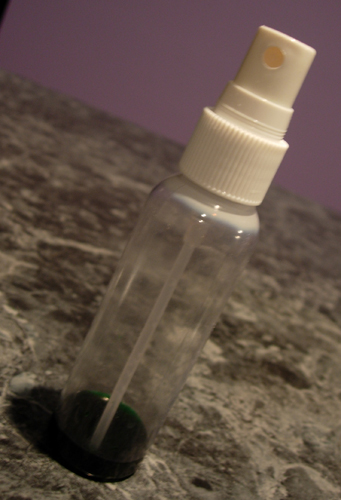
Small spray bottle
Mold of desired shape (round halves, or candy molds)

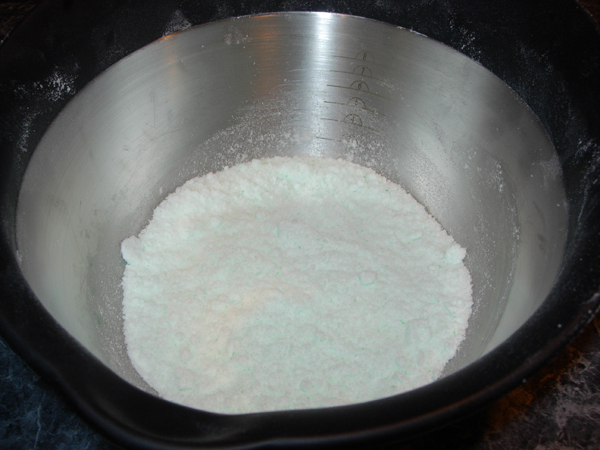
Start by adding all of the dry stuff together (baking soda, citric acid, Epsom salts,) in a large mixing bowl. Then add Shea butter, almond oil & fragrance or essential oil. Mix these VERY thoroughly, until the mixture feels dry & light.

Next, if you're using coloring, add 5+ drops to 3/4 Tsp water in the small spray bottle. Spray a couple times onto the mixture, and mix immediately. This is the crucial step, because water will set off the chemical reaction between the baking soda and the citric acid. Spray very sparingly, and mix in between. The idea here is to add enough water to the mixture so it can be molded, but add too much and you're in trouble!

A good tip for beginners; try dividing the dry ingredients into 2 bowls before you spray in the water. If you add too much water, you can save the batch by adding more dry mixture, and mixing until the reaction has been neutralized (an easy way to tell is to stick you ear into the bowl, if it's crackling it's still reacting.) With practice, you'll get a feel for just how moist the mixture needs to be before it will hold it's shape when molded. Another tip - using 2 round halves to make a sphere produces the strongest bath bombs. Other shapes are possible, but can be tricky to apply enough pressure on, and to un-mold.

Once you've got enough water, you can put the dry mixture into molds. Make sure they're clean & dry before you start - don't want anything sticking! The key to this step is pressure - the more pressure you apply, the stronger it'll hold itself together. If you're using 2 round halves, fill them both, then add more mixture to the tops, and push together. Smooth the "seam" as you go, and then set aside as you mold the rest of the mixture.

After a few minutes you can un-mold your new bath bombs. Gently squeeze the mold, then you should be able to lift it off easily. Smaller shapes with lots of details can be hard to un-mold, but patience is the key. If you accidentally crush the bomb, you can add a tiny bit more water, mix thoroughly and re-mold. Let them dry overnight, then wrap with plastic wrap.

Voila! Bath bombs that cost less then 5$ each! The yield of this recipe (how many bombs you'll get,) varies with how much mixture you stuff in the molds, and the size molds you use. Larger molds = larger bombs and smaller molds = smaller bombs. I usually get 1 giant and 6 mini bombs from this recipe (the giant ones are softball sized!) You could probably get 20+ small sized bombs!


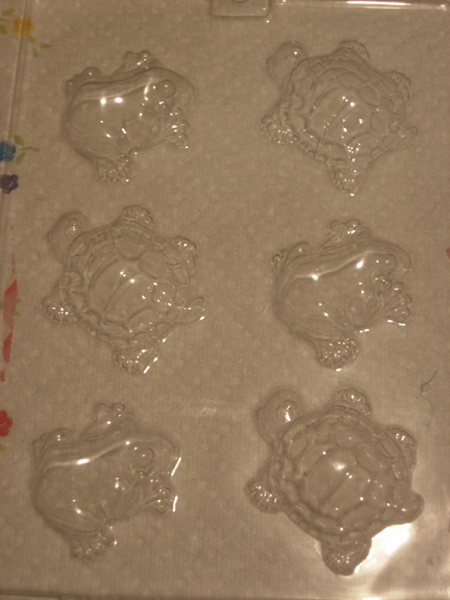
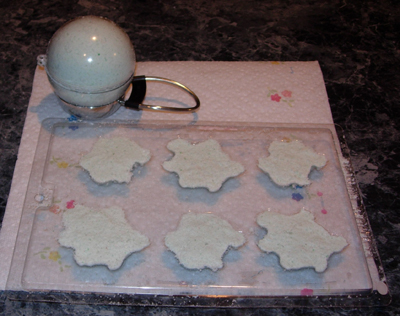
One more suggestion, if you have a small tub, use smaller molds. These bombs can leave the tub slippery, and so it's better to start with less oil in the tub, and work up to more. Good luck! I'd love to see pics if you make bombs of your own! (Also, feel free to ask if you any questions!) The frogs pictured here turned out well, but the turtles were very shallow and the legs break off very easily.


*Citric acid can be very hard to find, I'd recommend buying it online. I like Majestic Mountain Sage, they have lots of fragrance oils, no minimum purchase and shipping is actual cost. I must also mention their Jasmine fragrance oil is AMAZING!

Also, if Shea butter is expensive or hard to find, you can substitute cocoa butter or mango butter.

Please make sure you're not allergic to any of these ingredients before you use them! And be careful getting out of the tub, it can be very slippery!

LinkWithin

Related Posts with Thumbnails