6.8.10

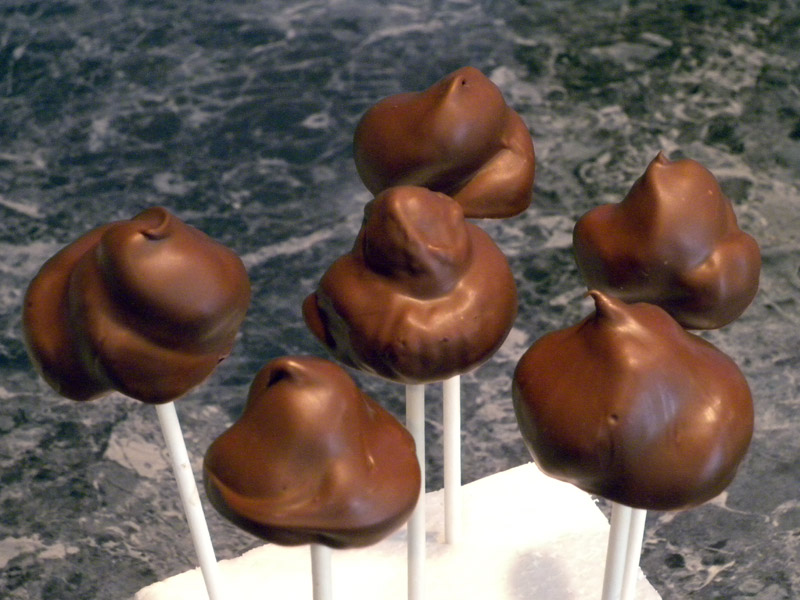
Some More Cupcake Pops! (and Poops! Ack, can I say poop in a title?)

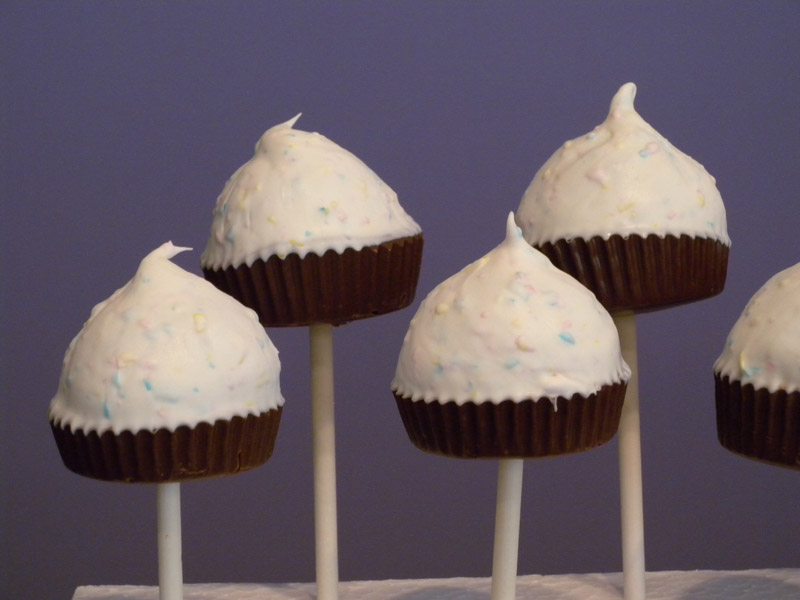
Cupcake Pops - Closeup Detail
I decided to make these cute cupcake pops for myself and Dear Sis, and I just happened to find the cutest pastel confetti candy melts for the tops! Aren't they so much fun?

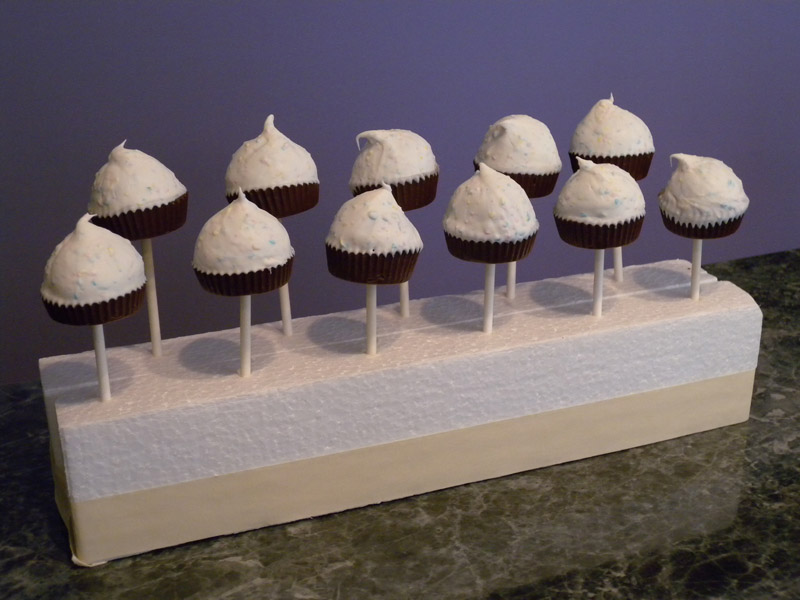
Cupcake Pops

This particular batch of cake pops started as a devious idea in my head for these - cake poops! 

Cake Poops

My DH is going through a rough patch, and my grandmother recently passed away... so it kinda went from just a tongue in cheek joke, to a "I may have to laugh at these or I may cry..." kind of moment... 

At least they're cute, or funny - depending on your sense of humor...

23.7.10

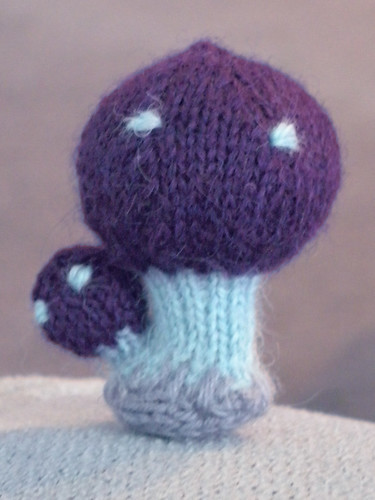
FO Fri - Plucky Mushrooms

When I made Anna's test list, I was so excited. And then, I realized just how fast you have to be, to become one of her testers! LOL So, I was very excited when I made it as an alternate tester of these cute Plucky Mushrooms. Aren't they adorable?

Tiny Mushrooms - in Alpaca!
They work up super fast, too. (Even though I had to wait to post about them! Hahaha!) Just leftover fingering weight yarn in your color choices, stuffing and seaming. It was a little tough to get used to size 1 needles, though - as I'm used to working a little bigger scale than this. (It's alright though, these were SO much fun!)

I used yarn I received in a Swap themed for women named Kari; the aqua and purple alpaca actually came from Norway! How cool is that?!? (It's where my family's from originally.) So, those two are both Tynn Alpakka, and the grey "grass" is Knit Picks Gloss (leftovers from June's Dolphin Shorty Shrug!)

Project Specs: see it on Ravelry!

Pattern: Plucky Mushrooms, Knitting Mochimochi by Anna Hrachovic
Yarn: Tynn Alpakka in aqua and purple; Knit Picks Gloss in Dolphin
Needles: Knit Picks Metal DPN's size 1 (2.25mm)
Cast on: Monday, June 8th, 09
Cast off: Tuesday, June 9th, 09
Completed: Wednesday, June 10, 09

9.7.10

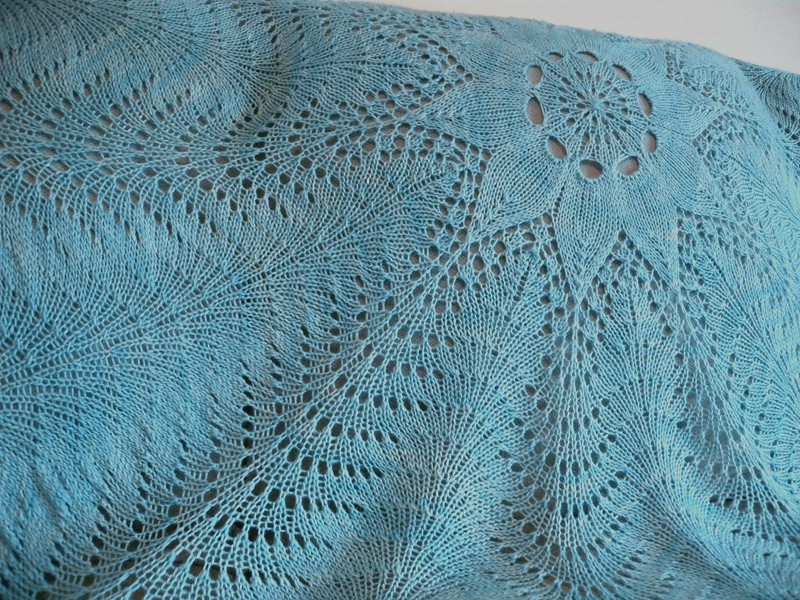
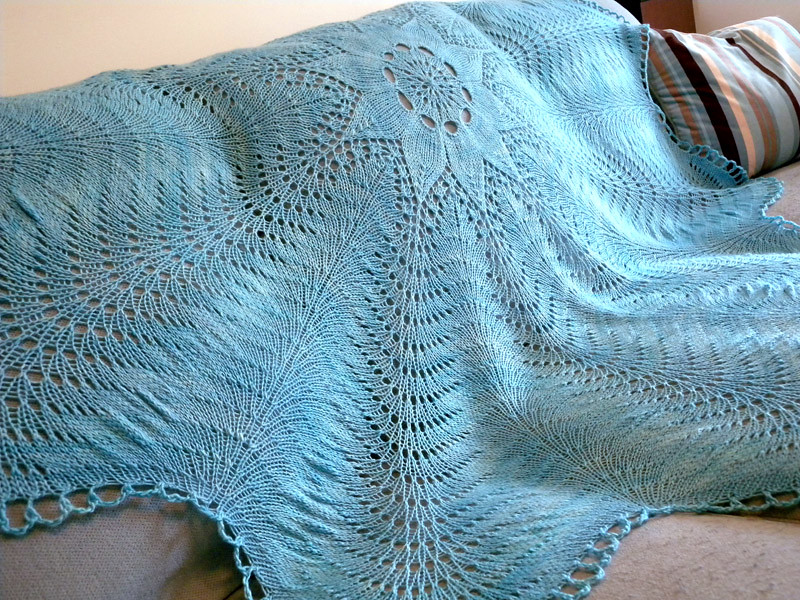
FO Fri - Lagoon Hemlock Ring Blanket

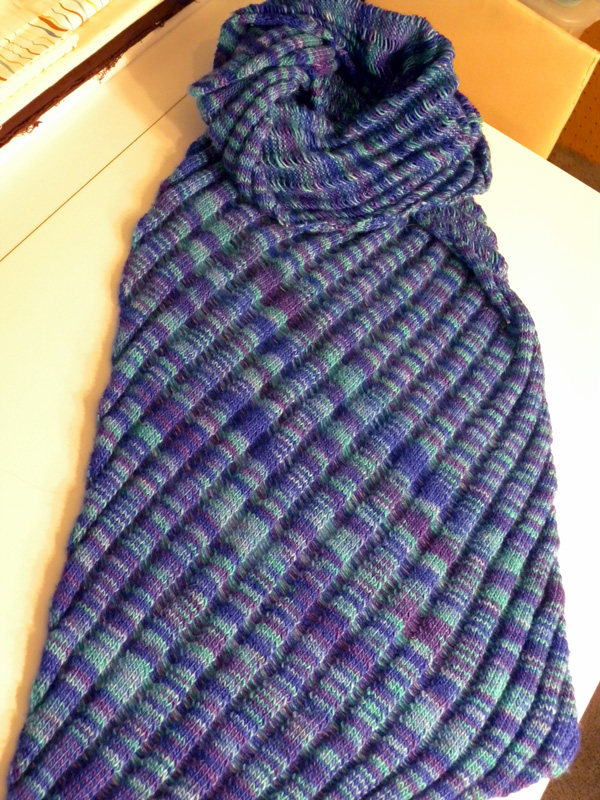
Lagoon Hemlock Ring Blanket
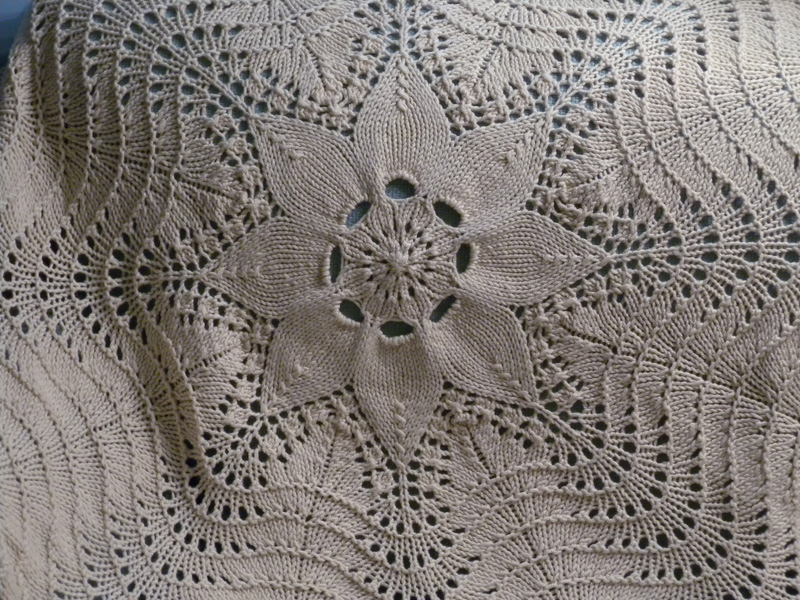
I can hardly believe how fast this project finished up (that is, except for the blocking part!) I was complaining last time, saying it would take forever, and then the edges sucked up all that end yarn! Hehe.

Oh, and then it took me forever to block it, because I'm a lazy procrastinator! I wish I'd added the garter ridge on this blanket, but I started it before the other one. Ah well, just another reason to knit one more for myself! :)

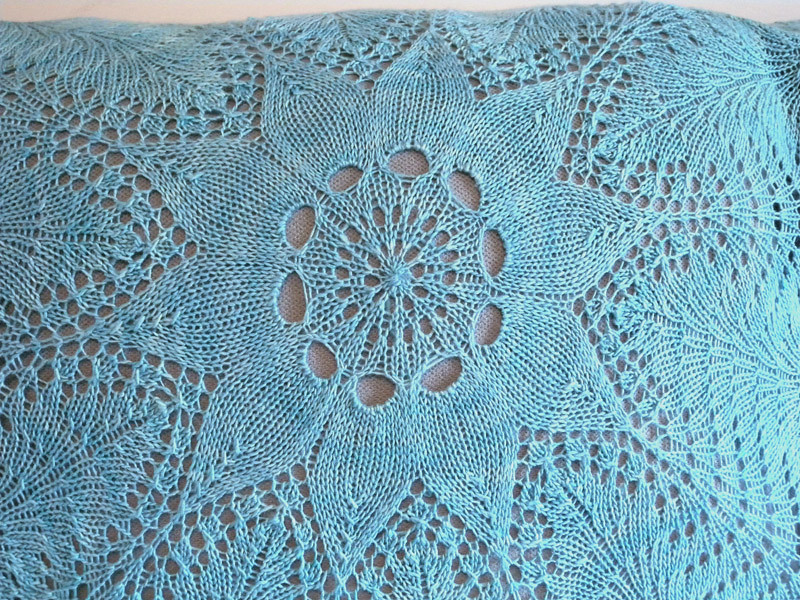
Lagoon Hemlock Ring Blanket - Closeup

Specs - see this blanket on Ravelry!

Lagoon Hemlock Ring Blanket

11.5.10

Back from Italy!

I'm back from from my whirlwind trip to Italy, and I must admit it was amazing! My DH and I did some fun tours, and a few ports on our own - which was good because all the power was out in Gibralter when we were there! Talk about bad luck! 

Much more to follow, as it stands I'm getting over something buggy (I refuse to believe I'm sick, so please don't even mention it!) and I have a crap-load of pictures to slog through. Over 1500 photos and videos, to be more precise!

7.4.10

Surprise Vacation to Italy!

I had a great craft post planned for today, but the last 36 hours have been quite a whirlwind for me! My DH found a wonderful repositioning cruise to Italy, that leaves in less than two weeks! So, craft plans must be put on the back-burner as I try and get all of my pre-vacation planning packed into a super short amount of time!

We're heading to the Mediterranean on a cruise ship, my favorite way to get to Europe. Everyone flies these days, but I actually revel in the 6 short days it takes to get from Florida to Madeira, Portugal. I wonder what it must have been like for my own family, who came to America from Norway about a hundred years ago or so (I think, Jenn - do you know any more???) Their voyage would've been much longer, on the order of weeks or months at sea; but the open oceans hold such a wondrous majesty to me. To see the night sky from the middle of the ocean is a thing of beauty. 

So I ask a favor of all my international readers! I'm headed to Funchal (Madeira,) Gibralter, Cagliari (Sardinia,) Rome!, Livorno, Genoa and Monte Carlo (Monaco!) just before the tourist season starts, in about 2 weeks. Is there anything I shouldn't miss? How about craft supply shopping, is there fabric or yarn shops? I'm also looking forward to shopping for leather in Italy, where's the best places to go?

Also food recommendations are totally appreciated! I usually have trouble figuring out what to eat when abroad, more because I'm not familiar with the local cuisine. Thanks so much!

5.4.10

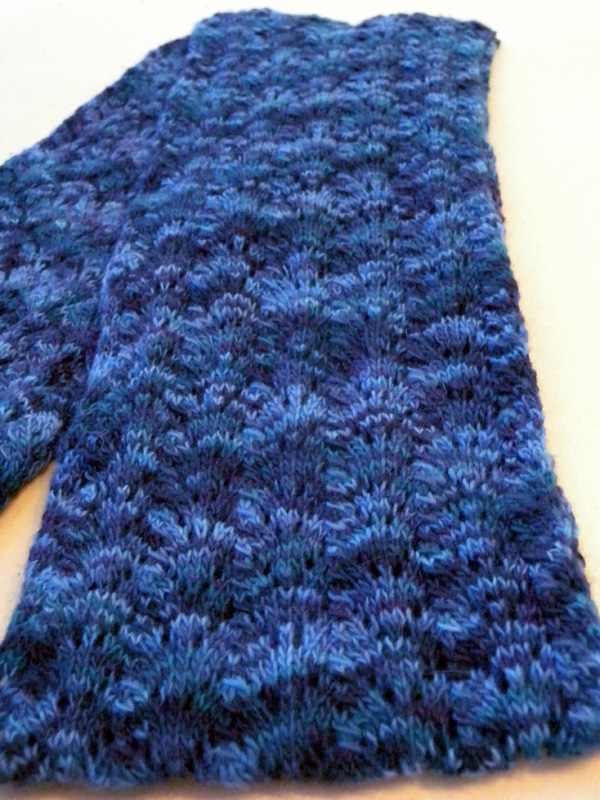
FO - Cliff Diving @ La Push Cowl

Cliff Diving Cowl - Finished!After I'd finished my Solitude scarf, I wanted to work with another single ball of Malabrigo Lace yarn. It's so yummy soft, and very enjoyable to work with - but I wanted to design something for myself, not follow a set pattern.

So, I went to my stitch dictionaries and found this pretty Fishtail Lace pattern; and knew instantly that it would be perfect with the yarn colorway I chose, Whale's Road. Blues and indigo with hints of green and purple, this particular colorway really captured my attention - even over the internet! (I love Eat.Sleep.Knit for Malabrigo Lace.) The color is more accurate in the first photo, but I wanted to post a closeup of the lace pattern, too.

I picked a cowl shape because really, they're all the rage right now, and I've knit a butt-load of scarves with ends already and I wanted something new! I started with a provisional cast on, so I could use Kitchener stitch  to graft the ends together when I (almost) ran out of yarn. That meant I could make a long cowl, capable of doubling or tripling to a warm, cuddly neck-warmer. God knows, we still need them here in Chicago - it's cold again this week!

Cliff Diving Cowl - Closeup

1.4.10

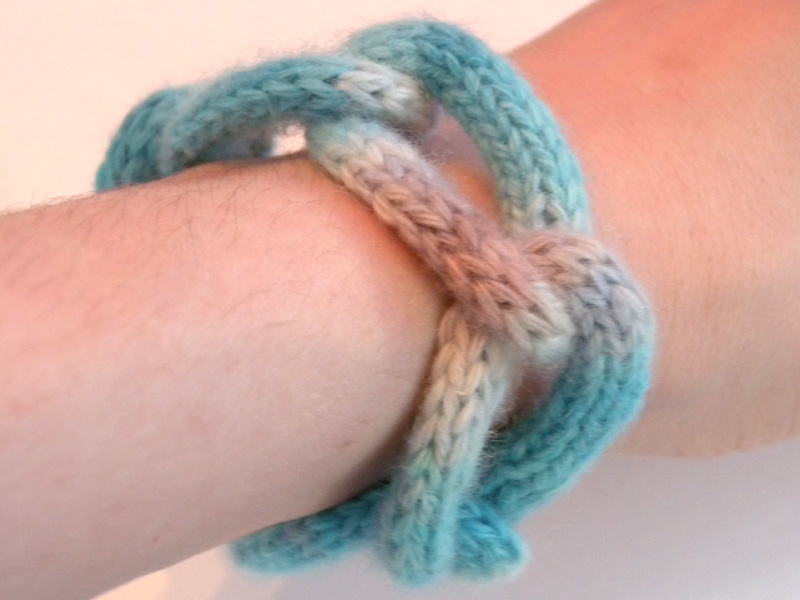
Soft Chains - Cashmere I-cord Chain Link Bracelet

I-cord Chain Bracelet

I've been thinking of using super soft materials for chains well, for a while... I guess basically since the spring fashion shows. I die for these Chanel's temporary tatoo chains, but they're also 75$ - so you know, I have to be content to covet and not own these, I fear. I wish I had the cash, though!

I-cord Chain Bracelet

So anyhoosals - my brain was kicking around the thought of using soft and otherwise relatively unsuitable materials to create a series of chains this month. Leather, suede and even cashmere, I find the textures delectable, and because I used some leftover Handmaiden 4-ply Cashmere for this one - even the colors are yummy! Yeay!

I-cord Chain Bracelet - side

This is just a basic I-cord chain link*, but I've got designs in the works for much more complex pieces. I just have to get working, and find out what actually works for me (and what fails miserably, as any good artist knows!) If anyone's interested, I'm toying with the thought of making this into a pdf. Please let me know if you'd like that, and thanks for stopping by! *Here's a link to the Ravelry page for it!

I-cord Chain Bracelet - back

31.3.10

Malabrigo March Wrap Up

I didn't do a kick off post, which I'd wanted to but couldn't find the time for amongst all the knitting! But, I decided I still wanted to do a wrap up post anyway, so here it is!

I love Malabrigo yarn. My favorites are Silky Merino and their Lace yarns, although I also have some Worsted in my stash. I love how soft they are, and how vibrant the colors are. 

Finished projects include my Caribenos Clapotis, another Montego Bay Scarf and my Cliff Diving @ La Push Cowl (expect the FO post very soon!)

Not quite finished projects include my Lagoon Hemlock Ring Blanket, a surprise gift lace cowl I barely cast on for and my Purple Mystery Hanami Stole - that I didn't even get the time to add one stinking repeat to! Which is crappy, because I cast on for it way back in 08! Damn, time flies! Hehehe...

30.3.10

One Yard Wonder Deadline Extended!

I was very excited to read this morning the deadline has been extended til April 11th, 2010 for One Yard Wonder's latest book. I do occasionally still sew, and I'm totally interested! I hope to submit this round, but we'll see if I can get my lazy butt into gear! Hehe.

I'm especially excited because I'm toying with the thought of using one yard of my own fabric design - yeay!

From the authors -
Our focus continues to be on unique, fantastic, and original one yard projects. While we are showcasing fabric choices and options, the book itself is really all about 101 great, diverse, and unique projects, which we know you have up your sleeve! Please keep in mind that your project should use nearly the full yard of fabric (no quarter yard projects please, unless they are part of a group project which takes up a full yard).


You are certainly welcome to submit more than one project.


On the Road to Spring - Week 4 - postponed!

This was the most intimidating part for me, as I'm kind of obsessive about keeping the lines all straight and together. I kept telling myself that I'd have to accept some mistakes, as they can't all be perfect; but I still procrastinated this step for days! Consequently, I have to take a week and postpone this one's update! I hope you'll all stay tuned with me, ans I try and work through my fears and finish my quilt!

29.3.10

Quick Craft - Suede "Chain" Bracelet

Another cute project on Craft:'s blog, I knew I had to make one for myself. The only question was, leather or suede? And then, what color??? I have bunches of scraps in some very delicious colors, so the choices were tough.

After it was all said and done, the magenta pig suede was the winner. I had a bunch of small pieces of it, and in suede - it was an experiment to see if this would even work! The real issue is, that the original links in the pattern are 3" long, but I knew I wanted something smaller; I wanted to make a bracelet, and I have freakishly tiny wrists. So, I re-sized the links to 2" long total (meaning they'd be 1" after folding.)

Suede Chain Magenta

At first, they seemed much too floppy to hold up. Not nearly enough structure for this project, I thought. So, I put it down for a few weeks. And then, I had the thought that after folding they should have more structure than they seem to! And I was right! A few links later I was finished, and that makes this one of the easiest jewelry pieces I've made in a long time! I used a doll-sized belt buckle to anchor the top, and it finished much prettier looking than the bottom (with no anchor.)

Suede Chain Magenta - Back

It was mentioned one can finish this project in one evening, but I'll give you this caveat; if you're using really sharp shears, like Gingher's - that I did - you'll probably want to space this one out a little more. I have a death grip on mine for some strange reason, and so I can only cut so much before my right thumb gets a dent in it from the scissor handle, and hurts - alot!

I love easy and quick projects, so I'm going to try and showcase more of the ones that inspire me the most! I'm also planning on more leather chain projects, this was so fun & easy I couldn't stop at one! Haha! Stay tuned in April for more of this same project, as well as a few of my own twists on it!


What are your favorite easy projects? They can be just fun or functional, and if they're both, I'll swoon. I love when form marries function!

*Fancy lettering from Daily Drop Cap - so fun & addictive!

27.3.10

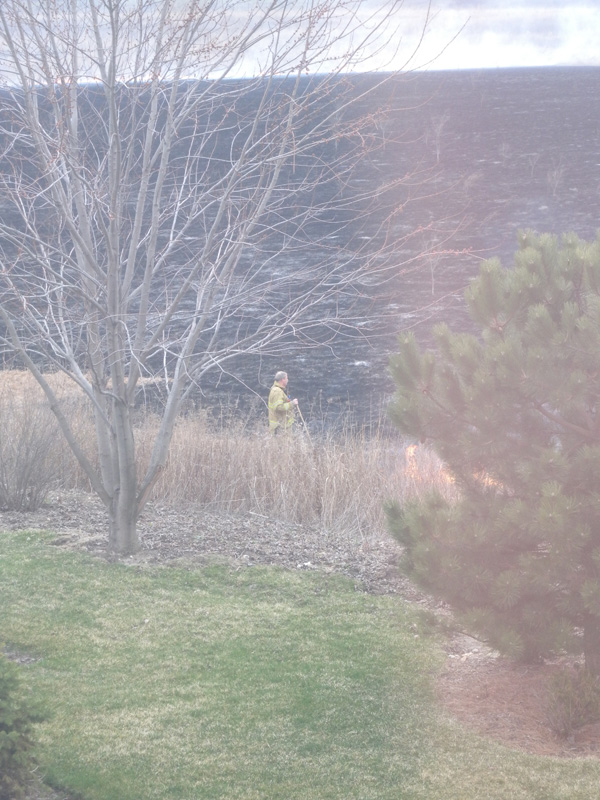
Aurora is on FIRE!

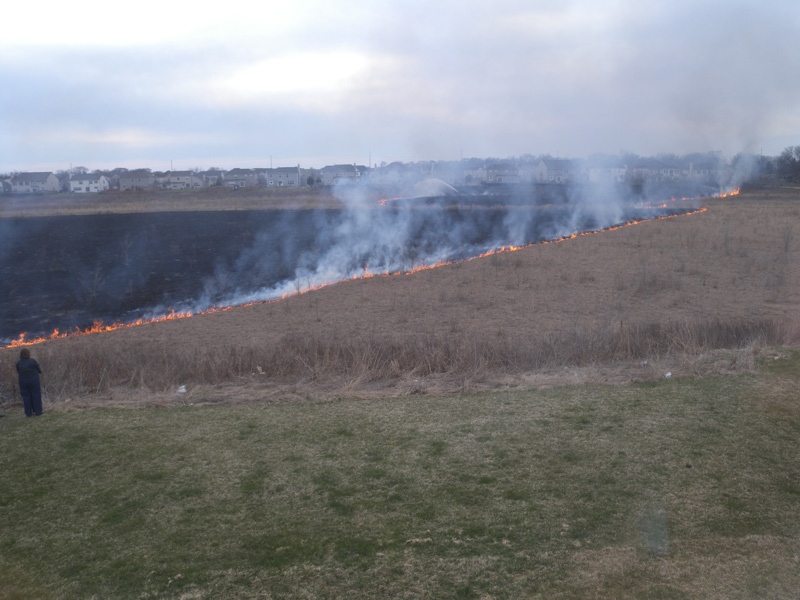
Fire 1You know when one of these is parked outside your house, it's not good...

But, as you can see, from the view outside my backyard...

It's ON FIRE!!!

Holy Crappers, I hope my local Fire Department can handle this, it's the worst fire I've ever seen

The entire grass land has ignited, and it licks ever closer to houses!  

Fire 4

Fire 3I have many thanks and gratitude for this guy, the fire fighter closest to my house! 

I can hardly believe it's come so close to not just my house, but so many others, as well. 

You should see the crowds gathering to watch the prairie burn behind my house.

Frakking unbelievable... please wish us well! 

ETA: Looks like the Aurora Fire Dept. has it under control, but wowsers! that was scarey!


Fire 2

26.3.10

FO Friday - Yet Another Hemlock Ring Blanket

I can't believe I've got another Hemlock Ring to show off this week, as I wasn't planning on posting this one til next week, but such is life!

Hemlock Ring Blanket w/ garter ridges!

I really, really enjoyed knitting this blanket, both because I added the traditional garter ridge found in the feather & fan pattern (not found on the original Hemlock pattern,) and because this yarn was like butter to knit with! So soft, and just the right amount of stretch to it. I almost wish I'd made it bigger, but I hate blocking these buggers when they're done - it's always such a chore!

Hemlock Ring - Closeup

24.3.10

WIP Wednesday - Lagoon Hemlock Ring Blanket

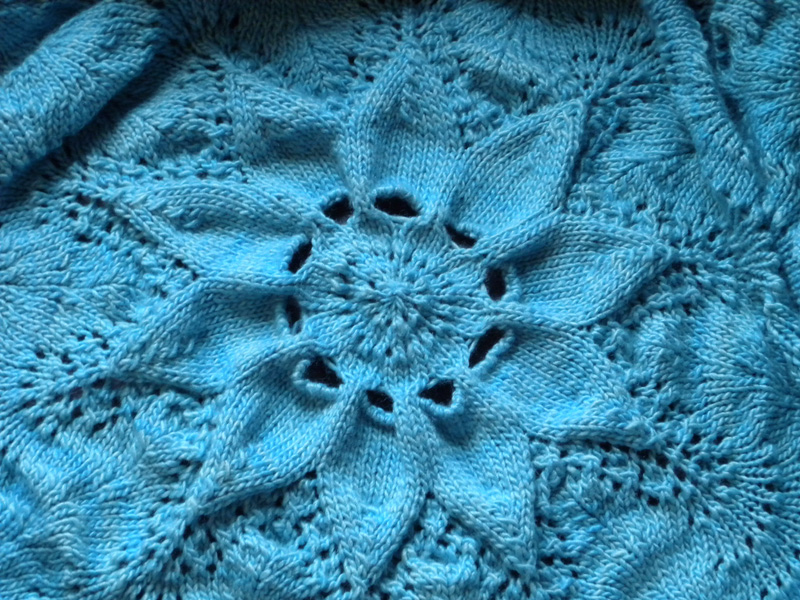
Lagoon Hemlock - Closeup

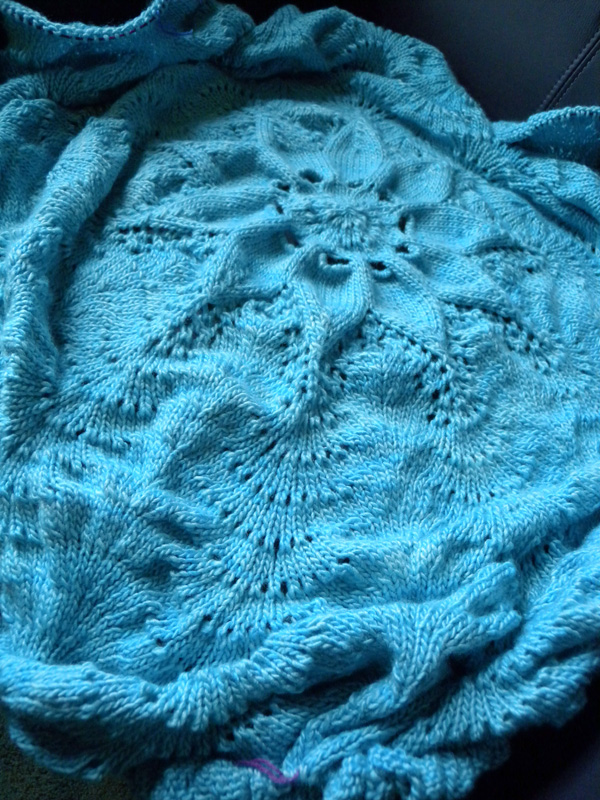
I've been wanting to knit a Hemlock Ring blanket for myself, for what seems like forever... It's a pattern I've knit several times, although not for myself until now! I love it to begin with, but in Malabrigo Silky Merino - it's positively delicious! The turquoise color did transfer a bit more color onto my hands than my Clapotis, ok a LOT more, but I hope since I won't be laundering it often that it will end up being a minor concern about the finished object.

Lagoon Hemlock WIP
I got a ridiculously good deal on this yarn at Webs, and although I do enjoy supporting the smaller yarn shops - you can't beat a great deal on yummy yarn! And this yarn is soooo yummy! Soft and really enjoyable to knit with, much less the amazing fabric it makes knitted up!

This blanket sat on the needles (is still kinda sitting!) for a long time, but I get bored with this pattern once it starts getting big, plus I got so distracted with gift knits! I just hope I can finish it soon, even though the colder weather is finally starting to leave Chicago, (just wait, it'll snow again! Haha!)

22.3.10

On the Road to Spring Quiltalong - Week 3


On the Road to Spring Quiltalong
Alright, so I really shouldn't be complaining, because I did get a fairly quick start on this project, and it's my very first real quilt (although I'm done a small amount of piecing and patchwork before.) But, I am reluctant to admit that I've only made a bit of progress since last week - putting together the remaining 6 strips to total 20 finished quilt strips.

I'm a tiny bit nervous about the next step - piecing the strips together to form the top... as the squares might not all line up quite right (and if you read my blog, you'll know how anal I am about that sort of thing!) I hope to get at least half of the strips together by next week, and if I'm really going for it, maybe the entire top! (That's reaching, I know, hehe.)

19.3.10

FO Friday - CaribeƱo Clapotis

Caribenos ClapotisWhen I saw this yarn on sale at WEBS, I knew I had to have it. 51/49 silk & merino means it's super soft, and the colors are just gorgeous! It transferred just a bit of blue dye to my fingers while I was knitting it, but not excessively so.

So, normally, the yarn this pattern calls for would cost you 120$ (maybe more plus shipping...) I KNEW I didn't want to spend that much, even though I love the Lorna's Laces Lion & Lamb. So, I waited. And waited some more... A few years later, this wonderful substitute comes onto the market, with even more colors than the recommended yarn. Yeay! So, I bought 5 balls - for a grand total of 45$ and I got the shipping free (because of course I had to order more yarn than THAT! Hahaha!)

I was hoping to have it done in two weeks instead of three, but sometimes you just don't feel like a smurf. Hehe. It was fun to knit, though; and even though I'm onto more complicated projects now - I wish I still had something simpler like this one, going at the same time.

Caribenos Clapotis - Closeup

The only changes I made to the pattern were adding one extra width repeat, and 5 extra length repeats. The third ball striped really nicely through the middle, but all of the other ones flashed and pooled like I expected a hand-painted yarn would. Huh?! I like it, though - and that's all that matters!

Specs: see it on Ravelry!

17.3.10

WIP Wed - Cliff Diving @ La Push Cowl

Cliff Diving Cowl - WIPI've been kicking around the idea of designing a knit pattern for myself lately, and I knew it needed to be made with Malabrigo Lace yarn. I had a single skein of the most gorgeous yarn, in their Whale's Road colorway - a rich mix of blues, greens and indigo (all beautiful jewel tones.) It's enough for a small thing, but not a large garment...

So, I went to my stitch dictionaries and found this great Fishtail pattern that I loved. I swatched a few times, first on larger needles then smaller, to pull the stitches a bit closer together. The most fun part was when I started knitting, I realized I could do more with it - so I'm super excited about the next (secret!) part of this project. Yeay!

The white is a provisional cast-on; I'm planning on grafting it together at the end, to make it seamless. For a while there, I was totally feeling the 3-needle bind off; but now that I've learned Kitchener stitch*, it's really my favorite way to finish a knitted item. 

What's your favorite method of finishing off your knits/crochet?

*To find the video for Kitchener stitch, you'll need to scroll down to finishing tips, the first listed under seaming is Kitchener. (Also, sorry for the awful picture. Even though the light is great in Chicago today, I sadly don't have the window treatments to be able to control it properly.)

16.3.10

On the Road to Spring Quiltalong - Week 2

I wish I had more progress to show off this week (and pics!,) but I've only managed to finish piecing a few more strips (I only have 14 of 20 completed. Bummer!)

Next, I'm onto sewing them all up together to form the top; but, I'm starting to wonder just how long that will take me! Haha! It is a fun project, working with my own fabric though! Just not a quickie project, although what decent sized blanket (handmade, people!) wouldn't take some time and effort to complete.

15.3.10

S'mores at Home!

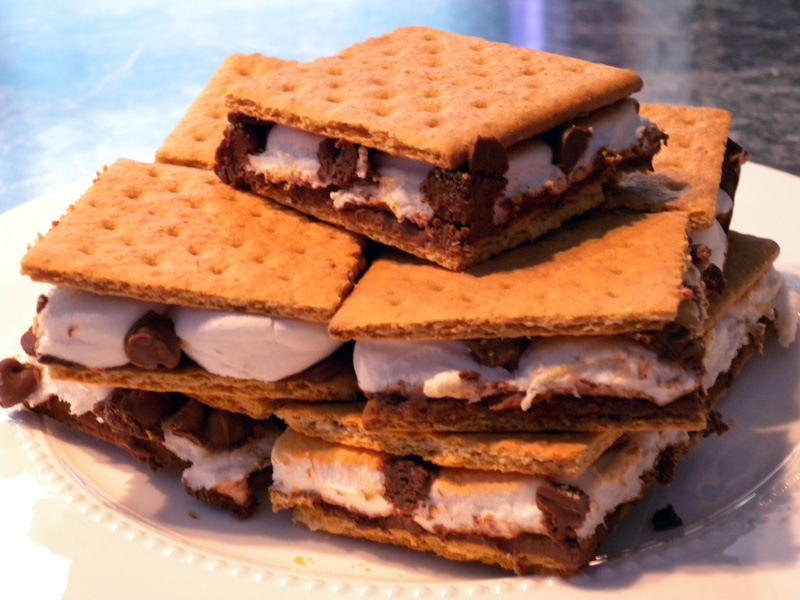
S'mores from the oven!

My husband was coming home from a long business trip on Friday, so I thought I'd whip up something quick and tasty we could enjoy, both as desserts and snacks! We both love s'mores, but we don't camp very often anymore, so I thought I'd try these at home, and see how they came out.

First, line a sheet pan with aluminum foil, and layer the bottom with graham crackers (approximately 18,) just like my sister's Peanut Butter Chocolate Bark. Then, melt 8oz of milk chocolate and spread over the graham crackers, taking care to cover them as evenly as possible.

Next, cut a whole bag's worth of marshmallows in half, either length or width-wise. (This is just so there's not super too much marshmallow in each bite, your tastes may vary!) Place the marshmallows evenly across the top of the chocolate, covering the whole surface. (You may need an extra bag, just sayin'!)

Broil the whole pan in the oven, on high for about 3 minutes. Alternatively, you could use a butane torch to toast the 'mallows. Place top halves of graham crackers on top, and break the bottoms as evenly as possible. Go ahead and try and stop yourself from eating one during the process. I dare you. Grin.

That's it! I didn't even think I needed pics to show the whole process, but if you'd like - I can go back and make another batch to add them! :)

8.3.10

On the Road to Spring Quiltalong - Week 1

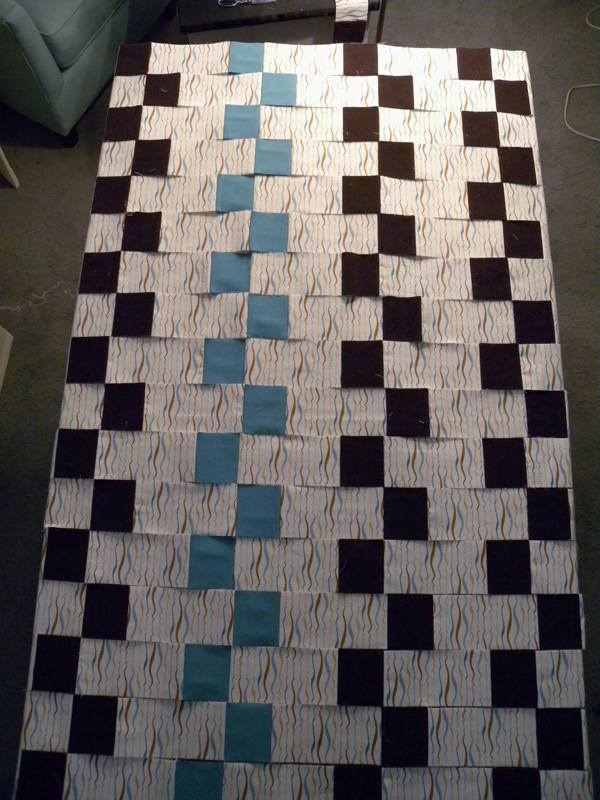
Quilt Strips - Closeup

Wow, what a week! I broke half my craft table last Monday night, unfortunately before I'd cut the corduroy squares (but thankfully after I'd managed to get the yardage ironed!) So yeah, it wasn't looking like the easiest week ever, piecing all the strips together on one half my regular work space...

So, I only managed to get 7 strips pieced together so far, but here they are!

Quilt Strips - Layout

It's a little tricky keeping the nap of the corduroy going only in one direction, but the print is a little easier to manage, I'm trying to keep the pattern intact. So, instead of just turning the strips around when I piece them together, I'm assembling them differently. 

Half get the regular treatment of rectangle then square (5 times for each strip,) and the other half start of with a square patch, and then I add the rectangle. I tried to be clever in my construction because I'm so obsessive about details on the back end of finished items (that is to say later, when I'm using them/looking at them!)

Big thanks go to DH, who fixed my craft table for me last night! Yeay!  Here's links to my first post about my quilt, and the inspiration - Randi's Quiltalong.

5.3.10

FO Friday - Solitude Scarf

... aka Yet Another Malabrigo Montego Bay Scarf, this time with fringe! (Here's the first MalaMontego Bay I made, for my MIL!)

Solitude Scarf - Malabrigo Lace Montego BayFor the last bunch of months this yarn was half of a Flutter Scarf, but I just wasn't feeling the ruffle end out of this yarn - 100% merino wool. The ruffles demand a drapier fiber content, something like silk, bamboo or alpaca; and to be truthful, they looked a little awkward. They just hung there, instead of draping nicely; so I never finished the second half.

The reason I picked Solitude for the name was two-fold. First, my husband and I'd just received a Peter Lik photo of the same name* we'd bought for his new home office, and the colors are to-die-for gorgeous! Secondly, I've been a fan of Nina Simone for a very long time, and the song Solitude seemed to really fit with what I felt at the time I knit it.

Solitude Scarf - Fringe Ends
When I started this scarf, I was really hoping to get the job at Lorna's Laces. It didn't work out for me this time, and so I decided it was okay to be selfish, and knit something just for myself. (I have a bunch of gift knits going right now.)

And then, the Ravelympics hit me, or rather I got obsessive and couldn't hold myself back from them. Fast forward a couple weeks, and here I am now - with a finished scarf and a blanket that's a quarter done. Hahaha...  
That's how I roll, folks - always unpredictable, even to myself!

Solitude Scarf - CloseupSpecifications - see this scarf on Ravelry!
*To see Solitude on Peter Lik's site, you'll need to visit the horizontal panoramic gallery (linked above and here - and click on the piece 5th from the left and all the way at the bottom (Wg197 Solitude) - be careful! His photos are a total time suck, even more so in person! Don't say I didn't warn you when you end up finding an amazing photo you totally love! LOL

    3.3.10

    My Fourth Blog-iversary!

    Wow. It feels so surreal to type this. I feel like I've traveled so far over the last bunch of years, and I haven't really gone anywhere! Haha! When I first started writing, I had no idea what I wanted to get out of it. No clear picture in my mind, just a hope that I could share my creativity with a community. Even though my ride has had it's ups and downs, I really hope this next year I'll be able to find my niche. I know it's there, I've just struggled to find it for a while. Wish me luck!

    2.3.10

    WIP - Bauhaus Throw Blanket

    When I caught the Ravelympic bug, I knew I wanted to pick a large project... and I'd been kicking around this idea for a beach-ey, by-the-sea version of this Bauhaus blanket for a couple of weeks. So, I decided I was going to knit a whole blanket, 4 pieces with seaming and all, in 16 days. 

    I know, you're sitting there saying to yourself, "Kari, why on Earth would you think of such a thing?"

    Bauhaus Throw - First Square

    It's because I'm a masochist, or at least that's as close I've been able to come to an answer on that one! Theoretically speaking, it would have been accomplish-able... that is, until I decided to dye my yarn, and didn't bother getting around to it until halfway through the Games - whoops!

    Ok, so now I'm going to try a new approach - I'm going to keep posting about this one until it's finished, and hopefully I'll want the damn thing done so bad that'll be enough! Haha! It is an easy enough project, I just need to keep at it, and I hope my fellow bloggers can help keep me motivated!

    Right now, I'm a quarter done with it... only knit one square. I really hope I have more to show off next week! Cross your fingers for me!

    1.3.10

    On the Road to Spring Quiltalong - The Start

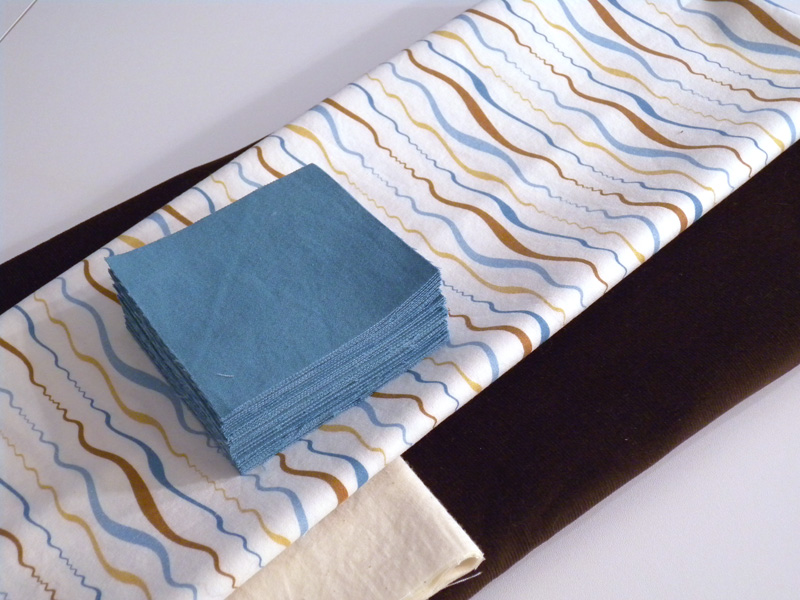
    Fabrics

    I read Randi's blog regularly, so when I caught in my RSS feed that she was organizing a quilt-along I knew I wanted in. And then, the Ravelympics hit me, and I set super high expectations for myself... I think it was a good lesson in juggling my biggest craft priorities right now, and I'm really pleased to share with you my very first quilt ever - and the first progress pictures of it! Yeay! :)

    I decided to use the fabric I won in Spoonflower's first contest. The colors weren't quite right (which is odd, because I'd proofed the printed fabric before that, and hadn't made any changes to my pattern file;) and it's been sitting around my craft room ever since. So, when I read how much fabric I'd need for this quilt my mind immediately jumped to the 2 pieces totaling 5yds of my cocoa squiggle stripe print. It was a bold decision, to use only one print fabric, instead of the ten different prints as suggested. But, I have a very good visual brain that helps me to see things in my mind, almost as clear as pictures - and I knew my concept would work. (Not trying to sound arrogant, it was also the novelty of making a quilt with my very own fabric print!)

    The keystone to my plan was to keep the neutral squares plain in color, but texture-rich; the chocolate fine wale corduroy works beautifully, and I had about a half-yard of this teal denim. It's smoother than the corduroy, but the color worked so well with my print, and I love a bit of bold contrast thrown into the mix! Plus, only having a tiny amount of the teal gave me a great design challenge of exactly where I'd place the teal squares!

    I had to back my own print with muslin, it was too transparent next to the other, thicker fabrics. Good thing I had a bunch of it in my fabric stash! It was a lot of extra work to double the HUNDRED rectangles I'd already cut; but in the end, I think it'll be worth it - when I'm not nit-picking about how I could have made it better - to death!

    So, there's my fabric picks (I wanted to photo them all done & cut, but I still need to pre-wash and cut the corduroy.) I haven't quite decided on the backing fabric, but I have a few options (including more of my own cocoa squiggle stripe fabric, yeay!) I'll also need to decide on binding, but I figure I can make both of those decisions a little farther down the road, hahaha!

    28.2.10

    Ravelympics 2010 - Wrap Up

    To be blunt folks, I'm a great big loser. 

    But, I'm alright with it this time... I knew the project I'd picked was a large one, and throwing the dyeing into the mix really messed my game up. This time, I'm just a participant, but I'm still determined to work on, and finish my Bauhaus Throw. (And hopefully, soon!)

    So, to wrap it all up, I've knitted one square of four, and dyed 2/3 of my contrast yarn to the right color. I was really hoping I would get the dye part right on the first try, but alas, I must over-dye one skein to match the intensity of the other 2. 

    Theoretically, the knitting part is easy-peasy - it's just a garter blanket, so I could get it done quickly; just not today. And, although I'm a little disappointed to not have met my goal this time; I'm really happy to have at least participated - we can't all win every time, right?

    So, did you meet your own Ravelympics goals?

    25.2.10

    Ravelympics 2010 - Update

    I was so set on not joining in this round of the Ravelympics, but of course I got myself sucked in! And naturally, I had to pick a much bigger project, because I finished so much in 08... 

    This time around it was to be a Bauhaus Throw, from Craft; zine's blog. I didn't have the recommended yarn, but I did have a ton of Elann Silken Kydd hanging around since I let the deadline for my Milkweed project lapse without finishing it. 

    I had to go up in needle size to get gauge, but that's really nothing new for me. These days, it's only a needle size or two, but when I first started knitting, I had a stranglehold on my yarn, and would regularly go up 4 or more sizes! Tension counts, folks - take it from me!

    And, to make it that much more difficult, I decided to dye half of my ivory yarn into a seafoam blue green for the contrast color. Which, really wouldn't have been that hard, except I totally procrastinated it, like entirely! And then, to make matters even more complicated, I managed to dye all 3 skeins a slightly different shade of blue, even though I really tried to get them the same shade. Meh...

    So, I'm 25% done, and the Olympics close in 3 days... I don't think I'll make it to get my own gold medal, but I hope I can still finish my new blanket. Even though it's kinda static-ey, it's very soft, and SUPER light weight - so I hope it will be a good knit to have spent time on for my home. 

    Better late than never, eh? :)

    23.2.10

    Comment Moderation - Now On...

    I've had to turn on comment moderation, as there's a been a large spat of spam links popping up around here lately... I hate to do it, because I hate those robot foilers with a passion; but I hate going back and deleting spam comments even more! So, I hope you all can bear with me, and still leave comments - I really appreciate them! And sorry for the change, I really didn't want to do it, but I feel my hand was forced.

    18.2.10

    Moleskine Notebooks & a Candle for moi!

    Ever since I found ...love Maegan's blog, I'd been drooling over her designer clothing, purchased discount via Gilt.com. Now, I haven't found that many clothing items that work for me yet... but I happened to snag a set of these moleskine notebooks - one each month for the year, and color coordinated! They're so small, and I find myself actually recording more of my creative thoughts and ideas, instead of forgetting them forever like I used to! 


    Gilt is a free membership retail site, with crazy insane deals on tons of luxury goods. They only keep they're steals up for 36 hours though, so you have to be pretty quick! 

    I also just got an Ember candle from Jimmyjane (again, from Gilt) and I have to say, it's like a spa in a candle. Lychee and Lapsang tea, the scent is intoxicating, and I can't wait to try more from this brand in particular!

    10.2.10

    Hello!

    Hello ve tĆ¼m TĆ¼rkiye'den yeni okuyucuların hoş geldiniz! Seninle tanışmak memnunluk duyarım. Blog okuma iƧin teşekkĆ¼r ederiz!

    I've been featured on 10Marifet before, for my Beach Vase tutorial, but I wanted to take a minute to say thank you to all of my new readers from Turkey! I've always wanted to make more friends, globally - and I hope I get the chance to soon!(I also hope my Turkish above wasn't too terrible!) Thanks go to 10Marifet for featuring my Cashmere Ruffles Scarf.

    Another note entirely - I didn't get the job with Lorna's Laces, which was very sad. Thanks so much to all of you who commented, I really appreciate it!

    27.1.10

    Where life takes you...

    I've been thinking a lot lately about how much our lives can change for the positive, when we open ourselves up to the scary vulnerable state that is change. Especially us women... we want the change alright, but it also scares the crap out of us. There should be a "Crappers, I'm sorry" message for when my brain blanks. Seriously.

    The reason for all of the thinking, (for all 3 of you who care! lol) is that I have a job interview on Friday. It's informal & with a small business, and the woman on the phone seemed wonderfully down to earth, friendly and honest. I use the phrase "down to earth," because she's Beth, who runs Lorna's Laces*. I will repeat that, for those of who who couldn't do the math there... I - me, awful blogger, etsy shop failure, small potatoes me - have an interview with Lorna's freakin' Laces this week! They make the best yarn!

    I might even be able to put the year I spent on college in Fine Arts to use, so how bout that?!? Yes, Mother, if you're still reading my blog, you were right, it does count for something. Hhmmph.

    So, I need some virtual hugs people! My support system at home is limited, and I hate burdening my awesome sister too much with my neediness (or my DH, who works so hard so I can maybe grab an opportunity like this one!) Even sappy cheerleader comments would be appreciated at this point! And, thanks for reading this and maybe thinking of, or posting. I know just how life gets in the way of best intentions.

    Best wishes for a wonderful 2010 to the whole Craft-Blog-World!

    Shirley, June, Karrie, Adrienne - you are the kindest friends a girl could have, even though we're all so far away. I hope I can talk to all of you again very soon, even if I do get a 9-5 job again soon. I know it's my fault we haven't talked, and I'm so sorry!

    Jenn, I didn't mean to exclude you, I just hope I tell you more how much more I appreciate our relationship in person, than to need to do it on the blog - but for giggles sake - visit Jenn's Unblog. She's got the best blog concept, she posts inspiration content, and has nearly twice the posts I do!

    * here's the obligatory Ravelry link - Lorna's Laces Yarn

    8.1.10

    Recipe - Chocolate Peanut Butter Bark

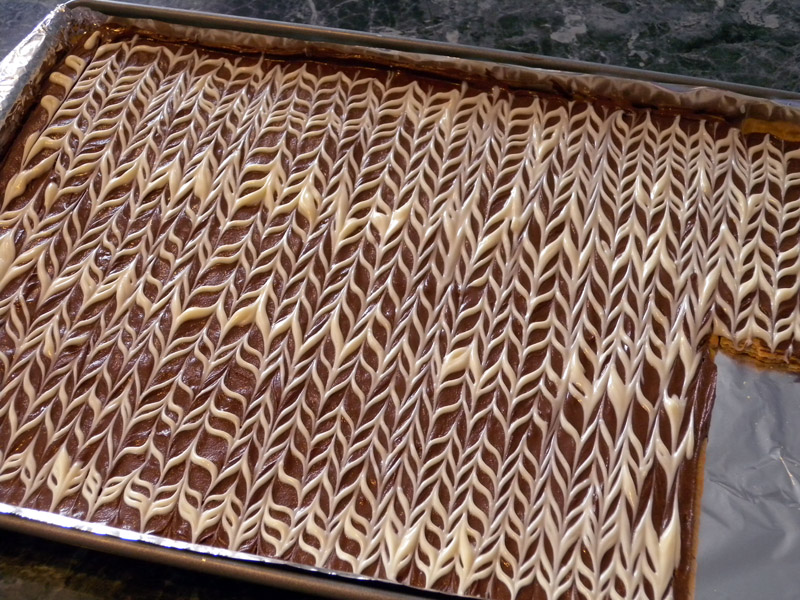
    Chocolate Bark - Finished!

    My sister was recently kind enough to bring over a bit of her (now famous!) chocolate peanut butter bark. Let me tell you folks, this snack might be the best sweet treat ever - but I'll let you try it out, and then tell me I'm right! LOL Anyhow, it may be one of the easiest food crafts I've ever tried, plus it has the added benefit of being both beautiful and super tasty! It's almost too pretty to eat. Almost...
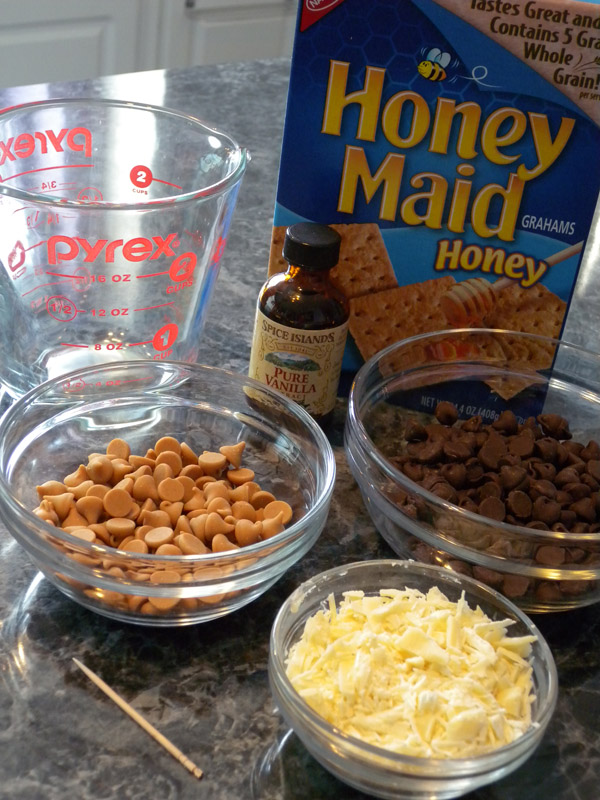
    Choco-Peanut Butter Bark - IngredientsIngredients -
    • Graham crackers (appx. 14, depending on baking sheet size)
    • 6 oz semi-sweet chocolate chips
    • 1/2 cup peanut butter (I like chips, as they're easier to measure and melt)
    • 3 oz white chocolate
    • 1/2 tsp real vanilla extract* (I added this myself, as I add vanilla to all desserts!)

    Tools - 9x13 baking sheet, foil, microwaveable bowl, offset spatula, mini squeeze bottle

    (Prepare tools & ingredients before assembling! As it finishes faster than a freight train, and you'll want everything right at hand.)
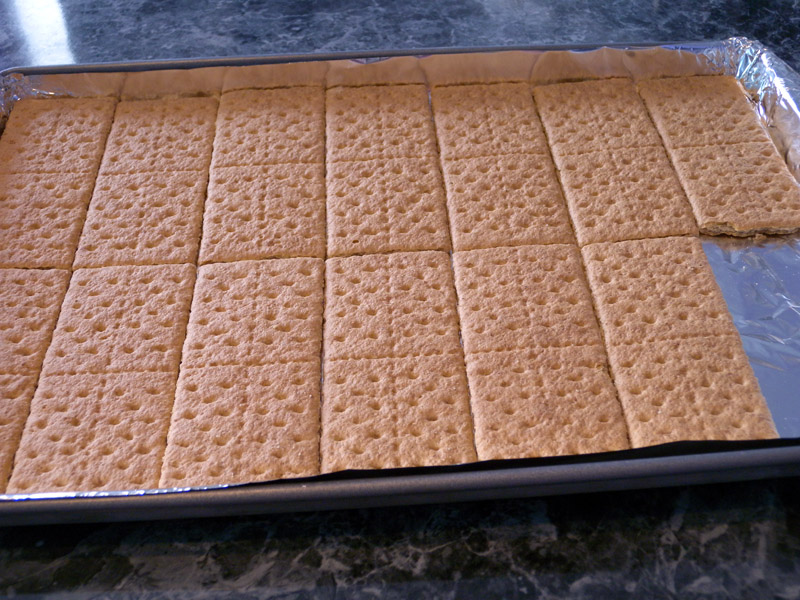
    Grahams in a Pan!


    Line a  9x13 baking sheet with foil, making sure to cover handles. Layer grahams onto sheet, covering as much space as possible. I found that they fit really well this way, but your container may be a different size. (Yes, I cheesed and was one graham cracker short for my photos, please don't hold it against me!!! They taste just as good, I promise!)

    Melt semi-sweet chocolate and peanut butter, and stir til smooth (and spreadable.) Add vanilla, stir in and spread over grahams with an offset spatula, making sure to cover as evenly as possible.
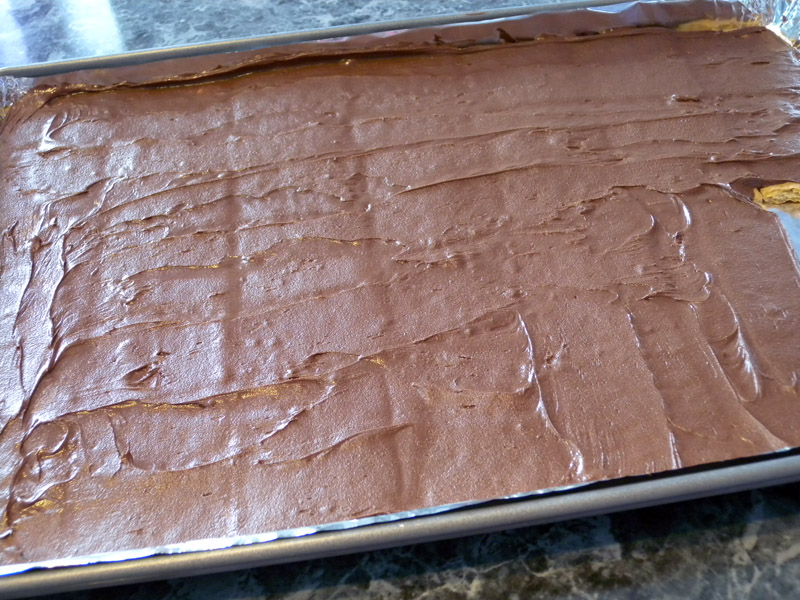
    Chocolate & Peanut Butter - Spread Out

    Meanwhile, melt white chocolate into a small squeeze bottle (usually in the candy melt section of the craft stores,) but be sure to keep it quite warm! Chocolate can "set" in these bottles, making it impossible to squeeze; melt with the lid off, and take care to keep the spout open (I like a toothpick for this task!) You can really decorate the tops any way you like, but I prefer toothpick marbling - and here's how I do it.
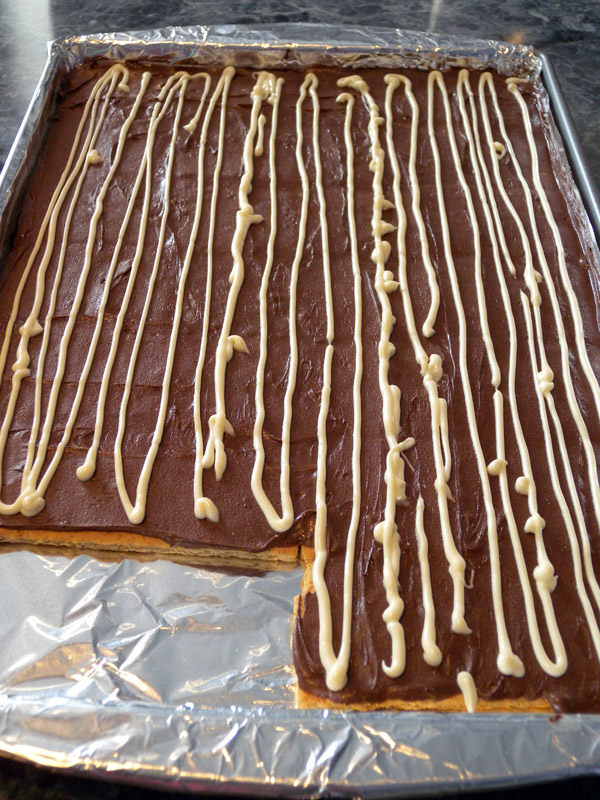
    Bark - In Progress!With the squeeze bottle, make vertical lines on the chocolate bark. They don't have to be perfect, but I like them better slightly closer together, for the marbling effect.

    Squeeze as much out of the bottle as you can, trust me it makes clean up easier! Be careful not to fart too much air out onto the bark though, as it makes terrible little pits in the semi-sweet! LOL

    Once you've got the squeeze bottle mostly empty, take a toothpick, and run it horizontally against the vertical lines; alternating first down, and then up - to create this pretty marbled effect.
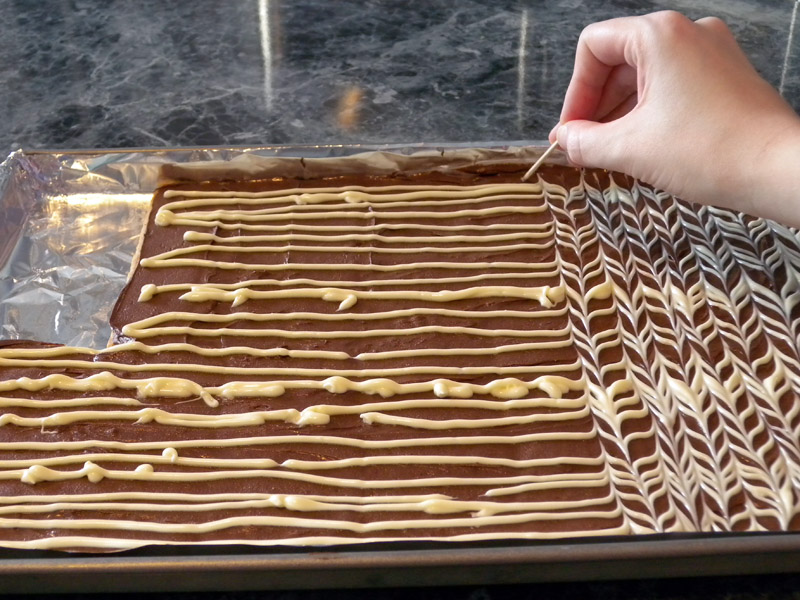
    Toothpick marbing
    It's so easy to do, and yet it looks so complex! Love it!

    Chill in the fridge for at least 30 minutes. Cut into pieces either before or after chilling, your preference. My sister likes to keep hers in the fridge, I leave mine out on the counter. It only lasts a few days, but with chocolate and peanut butter, I dare my husband (or anyone else's, for that matter!!!) to resist... Muahahaha!

    Alternatively, you could use the squeeze bottle to decorate your bark any way you like! Write your family's names onto it, draw flowers, a checkerboard - or anything you can come up with! Crafts like these really lend themselves to people's unique creativity, I think; and I hope you'd agree!
    LinkWithin

    Related Posts with Thumbnails