However hard I try to get a leg up on my holiday crafting & shopping; I never seem to get my act together until the end of the year. I have such high hopes for myself, and yet somehow, I put it off until I can't anymore. I'm sure there are others out there like me, I just know it! LOL
This year I'm focused on gifts that are relatively easy to make, mostly because I've made 1 or more of them before! That's not to say I'm rushing, because I'm kind of a perfectionist when it comes to the quality of my work; but putting my best efforts into items I know can make well makes the whole lot a little easier to deal with! I'm hoping to get a few tutorials together soon, it's a big part of why I started my blog, and I haven't put together one yet! I really enjoy sharing crafts/techniques with other crafters, there's so many awesome patterns and tutorials out there!
So, with the holidays fast approaching, I'd like to wish everyone easy crafting & shopping, and lots of holiday cheer!!!
1.11.06

13.10.06
::Tsumami Kanzashi Flower Snaps::
 When I saw the theme this month, I knew it would work perfectly with what I've been making lately! (Plus, I've been DYING to get my greedy little hands on a Sampler subscription!) A few months ago, I found a fun technique to fold square pieces of fabric into flower petals. This excerpt from PuchiMaiko describes it best, and was what inspired me to try it myself!
The word Tsumami means to pinch – specifically, pinching a square piece of fabric to form a shape. The word Kanzashi means hairpin. Tsumami Kanzashi is a traditional Japanese art form that dates back over 200 years. Tsumami kanzashi is most often seen worn by maiko (apprentice geisha) and young girls for shichi-go-san celebrations however, with the revival of traditional arts, and a younger generation appreciating them – tsumami kanzashi have become quite a fashionable accessory to be worn both with contemporary clothing and kimono.
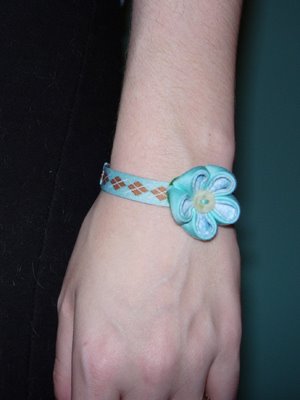
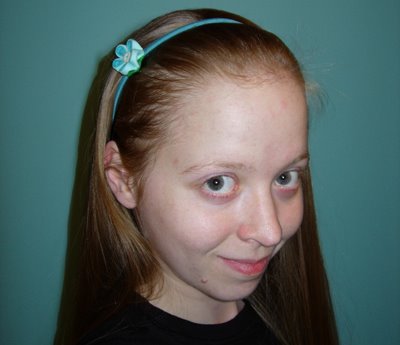 What I really like, though, is that I now have a use for all of those little fabric scraps! The petals I use most frequently are only 1" square, (you could use larger squares, but it increases the final flower size, and I prefer smaller.) I love being able to make coordinating flowers, for the sewing projects I have the scraps left-over from! A fun feature I came up with was adding a snap on the back, so I could pop them on & off. I like changing my mind a lot, and I thought it'd be fun to add other snap-on items like pin-cushions (for function!) and bows (for fun!) The snaps are anchored to a button on the front, which hides the messy middle. It also gives me the opportunity to use coordinating (or) contrast thread, or embroidery floss.
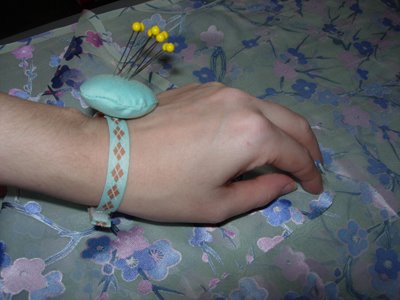 There's only 2 different petal shapes, round and pointed; but they can be combined in a ton of different ways. My favorites so far are double petal plum blossoms (which have 5 round petals that are 2 layers of fabric sandwiched together,) chrysanthemums (16 pointed petals,) and camellias (8 round petals.) I'm working on more combinations of shapes and colors, but I can't seem to decide on names for all of them!
 The wristlet is nice ribbon I just added some velcro and a snap to, and the headband was store bought. It's fun to think of new things I can add snaps to, and to come up with new items to snap on! I tried a magnet to hold pins & needles, but it turned out kind of heavy, and sort of flops all over the place. I guess I'll stick to plain-old stuffed pin-cushions. I'm always amazed at just how much stuffing will fit in! LOL I really like hair clips (although I can't sew the snaps on, I have to use special glue,) and God knows with all the hair I have, I need them! :)
If you'd like to see masters in action, check out these Kanzashi movies - #13 Edo hair ornaments: actual craftsman using traditional techniques. These are ABSOLUTELY worth the time! (5 movies, a few minutes each)
Sorry for the pics! Chicago sun hasn't been cooperating, and it was tough trying to photograph my own wrist! Maybe I should've waited for my husband to get home from work!
 I couldn't quite figure out if this belonged in the Design category, or Skill. I like the design aspects of the flowers, but they also take quite a bit of skill to create! I'm really not sure, so I'll leave it to you guys!
Good luck to all of the participants! Whiplash rocks!
28.9.06
Affordable art!
I found this post on Design Sponge's Guest Blog, and just about died! I instantly fell in love with the Leafy Mystery series, and I'm scheming to work #'s 2, 5, 6, 8, 14 and 15 into our home decor enough to justify getting them all!!! Insert wickedly evil laugh here!!! Mwahahaha! At only 20$ a piece, they're not so expensive's it's impossible!!! Seriously, you have to check out Christopher David Ryan's site - My Little Underground - the work is wonderful, and totally affordable!
27.9.06
Crafty Ginger Opens Shop!
Here's a link to the store; I'd love to hear comments/suggestions, I really want to make my products the best they can be! If anyone's interested, I have a previous post on how I make my tsumami kanzashi flowers & how I came to find the techniques - here. Sorry this is so short, I had no idea all the tiny little details that needed tending to with a new store!
15.9.06
::La Femme Fedora::
First let me just say, Thank You Whiplash! (BTW: This is an entry in the Skill category for Whiplash September,) I realized a week ago I had a great hat pattern (Vogue #7460,) and wonderful fabrics - already on hand! That's right, this is a Finish What You Have project! That only took me 3 years to get back to and finish!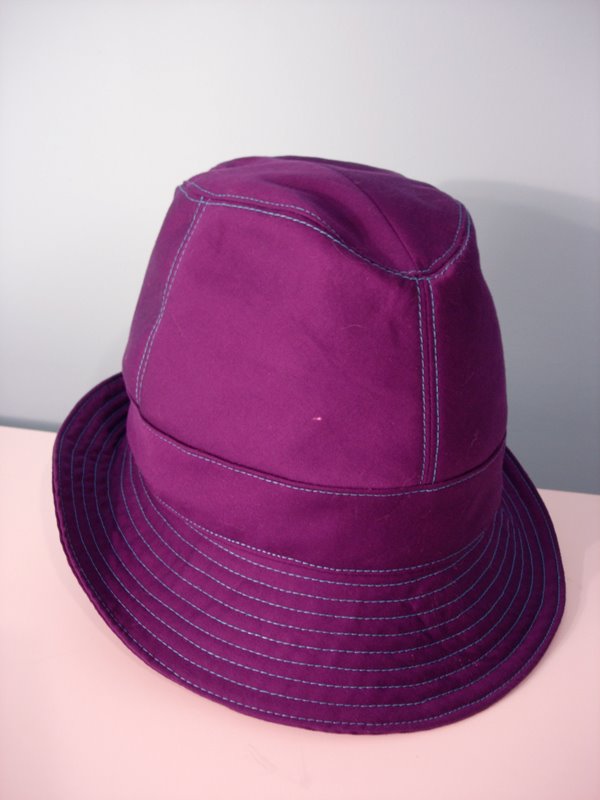 Alright, so I'm totally embarassed to admit I left it sitting that long... the thing is, I tested it with cheaper fabric, and screwed up the seam allowance; resulting in a non-fitting hat. Insert 3 years of total intimidation about sewing anything 3d. And then, something wonderful happened! I got back to it, and learned it wasn't so tough after all! I read all of the directions, twice. And measured my head, twice (LOL!) But the neatest part for me this time, was that I had already done all of the design work, all I had to do was construction.
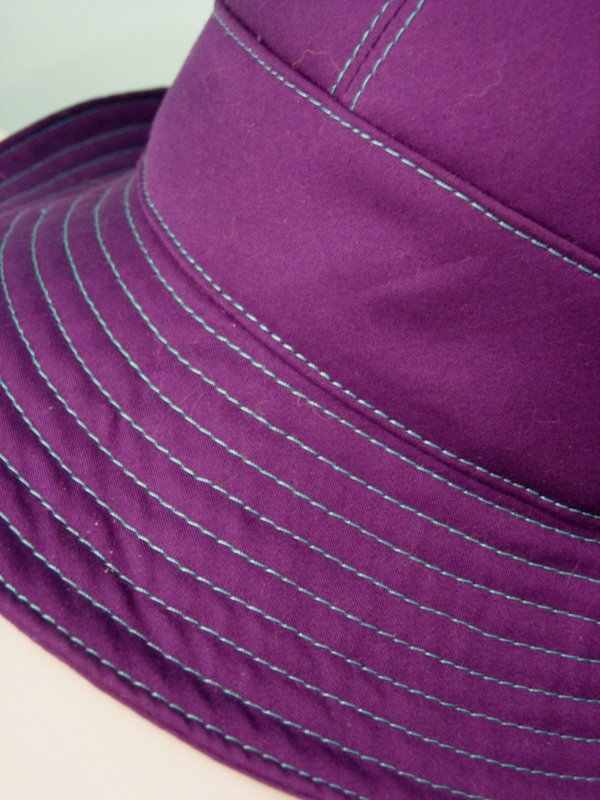 Ok, so I'm going to skip back to the beginning here, but stay with me, it's worth it!
Ahhh, the fedora. One of my most favorite hat shapes of all time. This came about after noticing Peta Wilson wear one on La Femme Nikita, a tv show based on the film by Luc Besson. LFN was so beautifully costumed, and the sets and props were so captivating. The music was unbelievably amazing, and it's how I found Coldplay (among many other amazing artists/bands *see below for a few!) years before they got big! Anyhoo, Nikita's first fetish in the show was sunglasses. Her second was hats, and she had some awesome ones. Her oversized black fedora is my favorite, but she had wider brims & smaller ones all the way down to a tactical ski mask!
 I've always wanted a fedora of my own, but thought it might be more fun in fashion colors. For this one I used cotton broadcloth (admittably too lightweight, but oh-so-gorgeous!) and turquoise silk charmeuse for the lining. I thought 1 layer of fusible interfacing wouldn't be enough to support itself, so I used 2 layers of (very lightweight) sew-in interfacing for the body, and 3 for the brim. The top & edgestitching could have been a little more even in some places, but I have to remind myself that nothing is totally perfect! It's my first-ever hat, and first contrast top & edgestitching, so I'm pretty pleased with how it turned out.
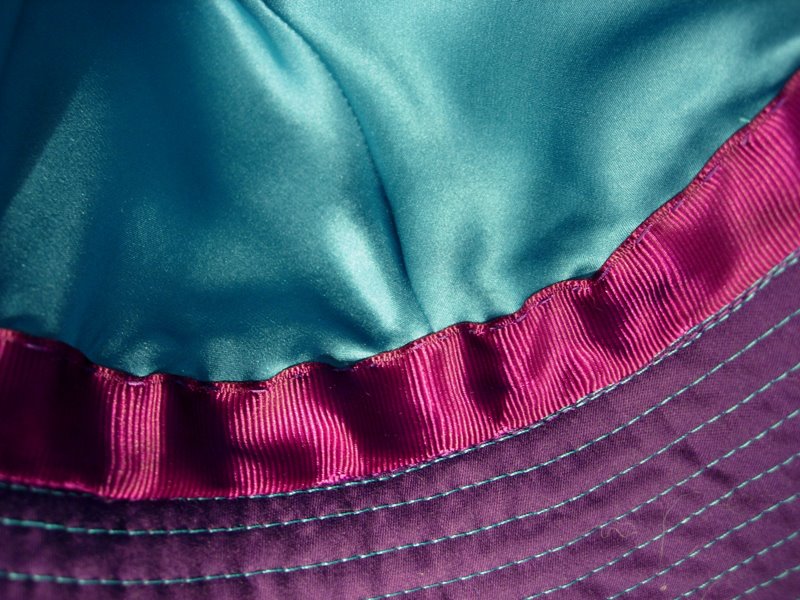 I bought the fabrics on Ebay, and only had to pick up the gosgrain ribbon trim, for the inside. (It looks a little pink in the pic, but it was just a red-toned purple. Didn't quite match my main fabric, but I liked it better than the sky blue back up.) The band and brim were the first easing I've ever done. they're slightly warped, but I managed to avoid wrinkles. Sorry for the non-action shot, I've been too tired & head-achey this week to want to pose for this one!
Oh - and it fits perfectly! Thanks again Whiplash for the much needed sewing gusto! Now I have no fear of curves, or tricky fabrics, or something new! It feels so good, I wish words could really express it! (I'm not so great with them, so I'll just say another Thanks! to everyone participating in Whiplash from month to month. You ladies (guys?) totally rock my world!)
There are so many great entries already! Good luck to everyone, and thanks again for the inspiration!
*Music from La Femme Nikita - The Philosopher Kings, Artour De Lucie, Beth Orton, Massive Attack and Diana Krall were just a few of the artists/bands I listened to while crafting my entry!
22.8.06
FO - Black Dream Shoulder Wrap
Well, the wrap has been done for almost a month now, but I was a lazy-butt with pictures... and posting them! LOL Well, here it is finally! (Click to see a bigger pic @ Flickr) I hope it cools down here soon, so I might actually want to wear it out!

(I might trim the fringe shorter... I left it long so I'd have the option. My husband & I agree it might be a little too long @ 13"! LOL I just like to cover my bases... I have the tendency to change my mind mid-project!)
Here's the Specs -
(I might trim the fringe shorter... I left it long so I'd have the option. My husband & I agree it might be a little too long @ 13"! LOL I just like to cover my bases... I have the tendency to change my mind mid-project!)
Here's the Specs -
- 2 balls of Lion brand Microspun, black - 100% Microfiber Acrylic
- Cast on 60sts with sz7 needles (held with addl sz2 for looser cast on & off)
- 32 (6-row) repeats of the modified-dropped-cable
- 5 rows of hand-tied fringe - 13" long (considering shortening this up...)
- Dimensions before blocking - 11"wide by 40"long (w/o fringe)
- Dimensions after blocking - 11.25"wide by 46" long (w/o fringe)
18.8.06
Next knitting project...
Here's a pic of the Blue Sky Alpacas - Pleated Skirt pattern I picked up last Friday, as well as a peak of the yarn I'll be knitting it with! Shock & awe - it's turquoise! I want to finish up my Razor cami before I cast on for this one, but I'm super-psyched!

17.8.06
FO - Craft: Skirt
I knew I wanted to enter in August's Whiplash challenge when I saw the topic - Wardrobe Surgery; I just didn't know what I was going to make. Then I saw Etsy's Craft: challenge, and inspiration hit! I believe craft is a very misunderstood word in America today, so I used the definition of the word to decorate a plain white skirt. I saw a few pieces of clothing a few years ago, done by Anne Demeulemeester, and this really reminds me of that. I think her words were screen-printed on, but I really like the bleeding-effect the fabric pen had. Originally I was going to use a more scrolling, French-ish font… but I've recently been watching a lot of Firefly & Serenity lately, and thought I'd take a more authentic, slightly Western, but not prairie style. I'm very pleased with the way it turned out, and it was really easy-peasy! I found snow-white cluny lace at the craft store, and knew that was all I wanted to add. (I struggle with where to stop sometimes, although not to Santino proportions!) I believe this would go in the Embellish/Decorate category.
And here's the "after!"


Time - 20mins to position & trace words w/ fabric pen, 5min to pin & 15min to sew lace
Total time - 40 minutes
Cost - Skirt 29.99$, fabric pen 1.99$, lace 2.28$
Total cost - 35$
I really couldn't be happier with how this one turned out! I hope you guys like it! I'd love to hear comments!
Razor Cami - UFO
After I saw Kati's cami, on the knit-a-long, I knew I wanted to try it. It's my first sweater, first circular and first lace project ever! I'm pretty proud of my progress, I started about 2 weeks ago. Here I'm at 16" in, and I need to measure (myself,) to see if I want it longer than the pattern calls for. I should probably just split for front & back though, because I don't have very much of my second (& last,) ball. (YarnMarket only had 2 left, last I checked!)


I whipped up a set of stitch-markers for this project, so counting would be easier. I'm SO glad I did, there's 12 sts between each, and I can even knit the lace in front of the tv!
I whipped up a set of stitch-markers for this project, so counting would be easier. I'm SO glad I did, there's 12 sts between each, and I can even knit the lace in front of the tv!
16.8.06
...and more presents!
My sister made the sweetest little bag for me! It's the Best Friend pattern from Knitty, I found it awhile ago and loved it, but had no clue she was making one for me! Thanks Jenn! She even added some lavender from her garden, and it smells so lovely! She did an amazing job on the seaming (which I haven't pictured here,) they're almost invisible!

Oh, and did I mention...? It's CASHMERE!
Oh, and did I mention...? It's CASHMERE!
Presents!
Shirley, from Warm Fuzzies, is such a sweetheart! (You SO are!) She sent an awesome apple cozy for my Mom, and a sock pup and Shiba Inu card for me! She left the pup's face for me, and I think he's probably going to be a sleepy guy! I LOVE lazy stuffies! LOL Here's the lovelies!


1.8.06
Time Flies!
Jeez... I haven't updated since the middle of last month! I really can't believe July went that fast! I knew I had been procrastinating getting good pictures of what I finished, but now I really feel like a lazy bum! Ok, self! Get it together! LOL
Hopefully, pictures will follow this afternoon; I've finished the black & white floral memo board, the microspun dream wrap and a new knitting needle roll for me (of course it's Tiffany blue!) I'm making good headway on my Craftster Tiny Challenge entry - thanks very much to Shirley's wonderful words of encouragement! She has a great blog - go check out Warm Fuzzies! Thanks girl - you rock! I hope your linen shows up soon, it sucks to be waiting on materials. I mostly wait on my lazy ass procrastinating things I have control over! LOL
Hopefully, pictures will follow this afternoon; I've finished the black & white floral memo board, the microspun dream wrap and a new knitting needle roll for me (of course it's Tiffany blue!) I'm making good headway on my Craftster Tiny Challenge entry - thanks very much to Shirley's wonderful words of encouragement! She has a great blog - go check out Warm Fuzzies! Thanks girl - you rock! I hope your linen shows up soon, it sucks to be waiting on materials. I mostly wait on my lazy ass procrastinating things I have control over! LOL
15.7.06
WIP Weekend!
After much internal debate (about what I could/couldn't cut out, to realistically finish,) I've made my July - To Finish list. On it are only 5 things, but I think I can finish them, and dammit I'm gonna try!
- Black & White Floral Memo Board - Just needs buttons tufted on, felt backing attached and mounting hardware.
- Black Microspun Dream Wrap - Finish knitting 2nd ball, weave in ends, block & add fringe.
- Craftster Challenge Entry - One Tiny Thing - This one's gonna stay a suprise for now!
- Boucle Knitting Tote - The most work left, by far. Ironically, I was just thinking matching ballet slippers would go great with this bag - that I haven't even made yet!!!
- Open Etsy Store - Photography, packaging and inventory.
9.7.06
Heatwave Knitting Needle Roll
Over the last couple of months I've made a few knitting needle rolls. These are giant rolls, with 50 pockets! I found the pattern (on Craftster,) here. For the latest one I made significant changes to the design, so I hope nobody thinks I'm trying to steal her pattern; I just thought it was a great place to start, and want to give her credit for it. So, I give you - Heatwave Knitting Needle Roll - for the Fancy category of July's Whiplash challenge.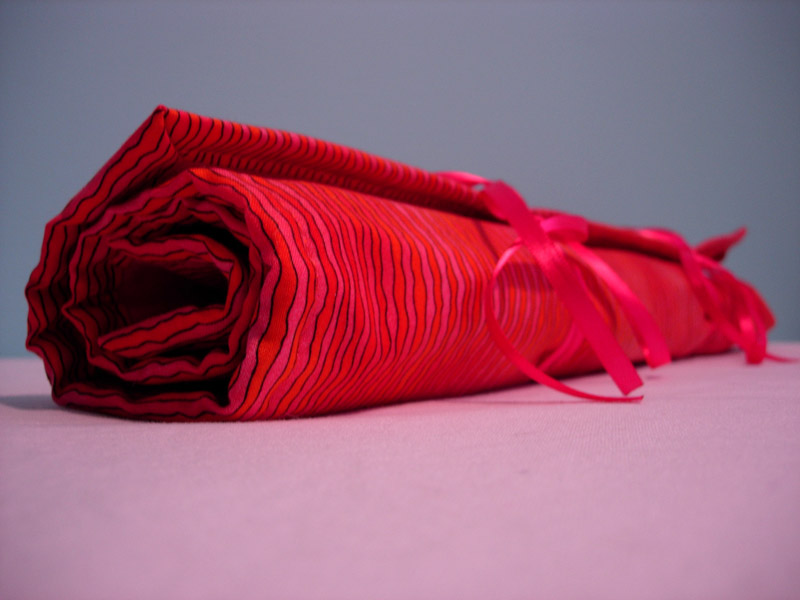 The fancy touch is the attached stitch marker holder(s), complete with Swarovski beaded stitch markers! There's 10 stitch markers total, and they're each different.
  My Mom like her earrings like
 that, so I'm hoping that she'll appreciate the
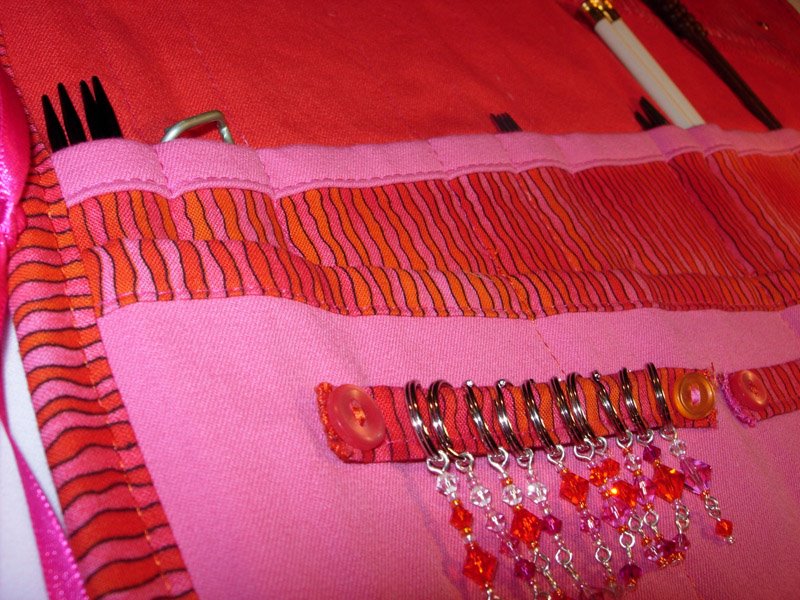 ir unique qualities. I also think the color combo is very nice too! The print is cotton quilting, the orange & pink solids are both cotton/ lycra blends & I used fuchsia ribbon for the ties. The stitch ma
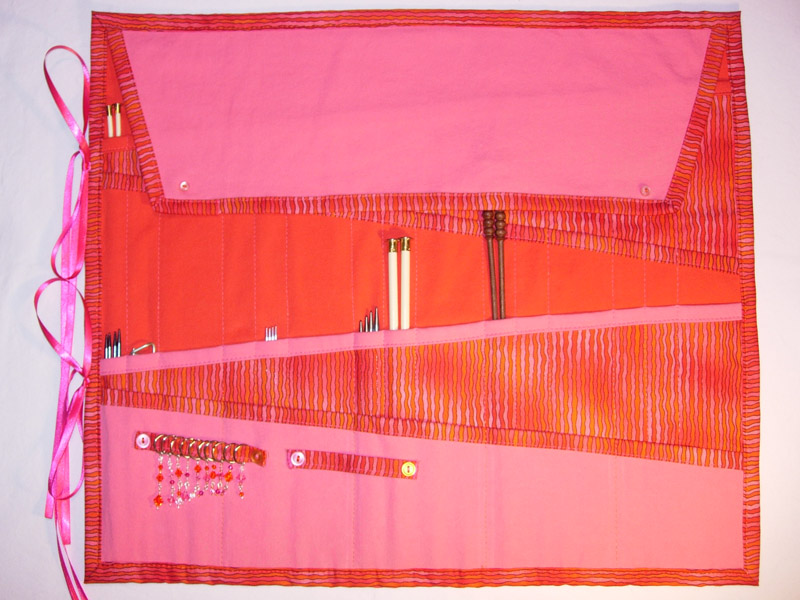 rker holders (as well as the needle guard flap at the top) are secured with snaps & decorative buttons. The neat thing about them is that I sewed opposite snaps on each end, so they'll hold together on a keychain or wherever!
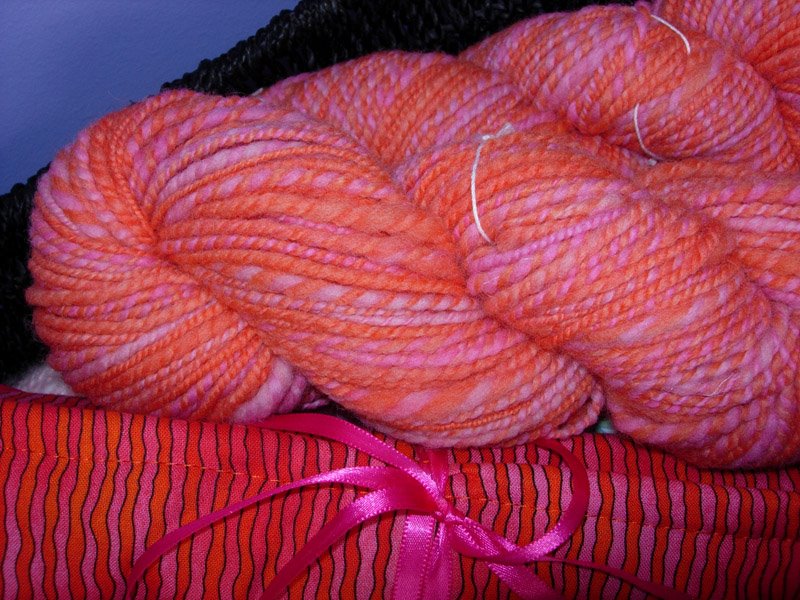
 My Mom and I found the fabrics (which actually were all remnants) at Vogue Fabrics in Evanston - which was a really fun trip a couple weeks ago. I'm really looking forward to going back with her, there's just so many fabrics, trims & anything else you could think of! This is a present for her birthday, and I even had some yarn made for her (Thanks SOO much Fuzzy Bunny! Go see her shop)! I know she's going to be so happy with everything!
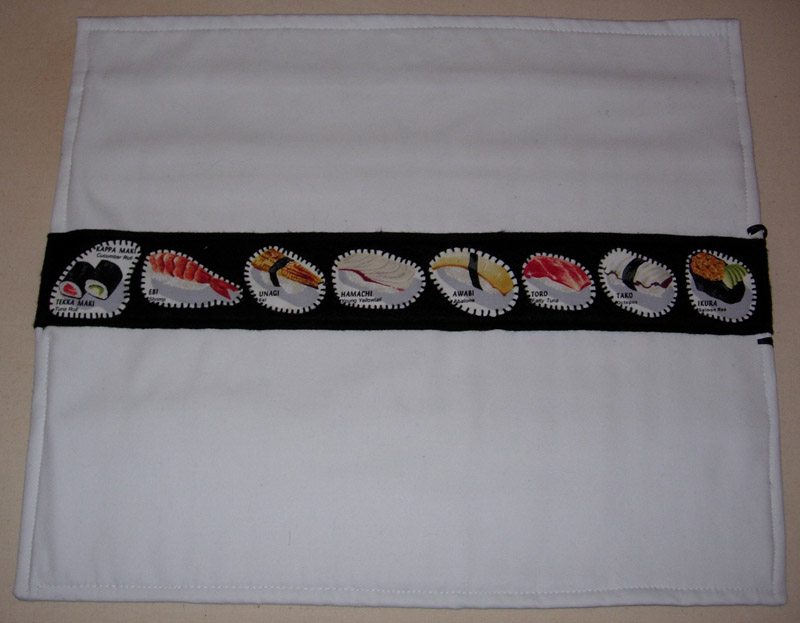 If we're allowed a second entry I'd love to enter my Sushi Needle Roll - for the Skill category (if it's eligible, of course… this one was straight off of Alexandra's pattern.) It was also made with remnants, from pajama, quilting & curtain projects! The outside embroidery was the real challenge for me, it's been years since I've done it, but I'm relatively happy with it. The spacing could have been more even, but that's the Monk in me! I made the sushi patches by gluing the sushi fabric to white denim
 (all of the sushi fabric is lined, it was quite transparent against the black), and then embroidering them onto black felt with fancy cotton embroidery thread. I've never sewn so many layers of fabric together before (the outside edges, I mean)! At one point it was 9, so I'm happy I could still keep the tension nice & even for all of it. It was a gift for my sister, and I'm happy to report she likes it very much!
  The real story is this - my Mom & sister are packrats when it comes to knitting! So I just knew I had to help them to organize their giant collection of needles! Only a GIANT needle roll would do! The outside dimensions of both are 17½" tall by 20½" wide when unrolled, with 30 pockets that are 1" wide, 15 that are 2" wide, and 5 that are 5" wide. Now if only I could help them with their GIANT yarn stashes…. wait a minute! You guys
 could just donate some of it to me, my yarn stash is only 1 bin big! Hint, hint!!! ;P
I just wanted to note that I tried really hard to photograph the needle rolls better, but they're just so big, it had to be plain-jane-straight-on. I tried to incoporate some more fun angles, I hope you like them!
My first FO post - Dream Swatch Headwrap
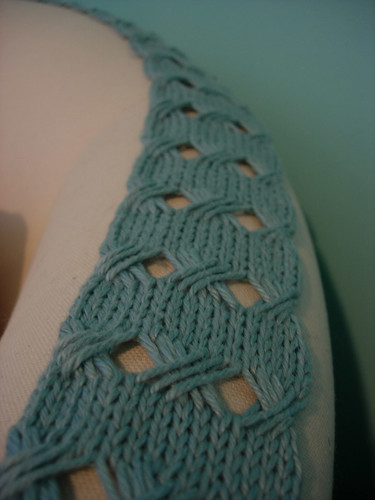 I'm very happy to post my finished Dream Swatch Headwrap. The pattern is free, and you can find it at Knit & Tonic. Thanks Wendy for such a great pattern!
The yarn is Classic Elite Premiere 50%/50% Pima Cotton/Tencel blend; color is seafoam, I'll have to check for the number. It photographed a little bluer than it really is, the wall is robin's egg blue (behind the chair.) I used size 6 needles, one (leftover) skein of yarn, and had it finished in over a week of (very!) lazy knitting. Have I mentioned I've been knitting for almost 4 years now! And this was my first cable... sort of makes me think I need to learn a little more!
I modified the pattern slightly, by using only 3 repeats of the modified-dropped-cable, instead of four; I wanted it skinny! I liked the pattern so much - I had it memorized after only one cable! - that I've already started another one! The second is black microspun with 10 cable repeats, and I'm hoping to make it at least 36" before fringe, although with only 2 balls, we'll see if it makes it there!
Subscribe to:
Posts (Atom)
LinkWithin
