9.1.07

FO - Quilted Patchwork Purse

Ok, so I'm more than a year behind everyone else on this, but when I saw the tutorial on Autum's blog, Creative Little Daisy, I knew I had to make one myself. This was actually a belated Christmas present for my Mother, who is understanding enough to not make me feel too bad about it's timing. I found the ribbon on the handle first, and just loved the combo of pink, purple and orange. Then I found the purple minky fabric, and knew what I was going to turn it all into.

Quilted Patchwork Purse

Well as it turns out, the minky doesn't quilt well, so I decided to leave those panels blank. Originally, I was planning on alternating the quilting thread color on each panel, but when I decided to leave the purple blank, I knew that would be the right choice for the quilting. I also decided mid-project to add cording between the outer body and the lining, although I kept it very petite.

Quilted Patchwork Purse - DetailThe orange stretch twill I used came from a remnant, and it had "Sample" marks all over it, so I didn't have enough to do the lining out of it. It worked well for the cording, and I used more of the pink stretch twill for the lining. It was a little thick, but I used a scrap of the purple minky for a gathered patch pocket, and so I think it all worked out well. I'm meeting my Mom for lunch on Thursday, and I hope she likes it!

The handle is 1" nylon webbing with minky fabric over it, and ribbon sewn on top. I was worried my machine might not sew through the webbing, but I actually had more problems with the final top-stitching at the side seams than anything else. I sewed the magnestic closures and the tops of the pocket to the lining for extra strength (by hand.) If you have any questions, feel free to ask!

8.1.07

The Best Laid Plans...

... of mice and men often go awry. Or so they say... I've decided to postpone my Sampler contribution a month. With the holidays just over, I didn't have enough time to get everything I wanted to together (which isn't really that surprising.) I was somehow hoping to get everything done, and I guess that's the lesson here; I can't do everything. I think a lot of women struggle with that issue, and it was definitely a hard realization for me to finally come to.

The hard truth is this; I have 6 flower snaps in my store, and 2 accessories. I have 4 dozen almost finished, but they need photographing and retouching. I only finished 3 flower snaps with hair barrettes, and was planning on donating 25+ to the Sampler this month. I also have plans for several new accessories, but they're only concepts & materials right now. I'll need to prototype something I'm happy with, before I make multiples to sell.

Also, I just finished tearing my craft room apart & re-organizing it; so it was really wishful thinking that I'd be able to finish everything. Oh well, it seems silly to get worked up over what I couldn't get done, when there's always more to be done! This year, I'm going to try and put more time & energy into my Etsy store, as well as learning how to use my new serger! There's a lot more that I want to accomplish this year, but I thought it might end up making me feel overwhelmed if I tried to list everything on my To Do... list! (Another one of my goals this year is to sweat the small stuff less! LOL)

5.1.07

My New & Improved Craft Room!

Whew! I knew a few weeks ago, when I decided to add another wall of shelving to my craft room, that my timing wasn't great - being Christmas & all. I went ahead with it anyway, if you know me, you shouldn't be surprised, I'm a stubborn ass sometimes! And here's the outcome! I'm super pleased with myself, I need order in my craft room; chaos drives me crazy! LOL

Craft room

It's basically just hang tracks on the wall, with adjustable brackets & shelving. To that, I added lots of clear bins, large & small, rolling carts and my sewing machine (which is on a rolling desk.) I moved the pegboard section out from the closet, where it's much more functional. That also opened up a ton of space in the closet, which also has hang tracks and adjustable shelves. I'm really happy with the outcome, it's such a tiny room at 10ft by 10ft, so I really have to keep things clean, or it starts looking cluttered so fast!

Oh yes, I almost forgot! I got a serger for my birthday! Woooo Hoooo! Can you tell I'm excited? LOL It's a 5/4/3/2, so it'll do just about any stitch I need - that is when I figure out how to thread it! Now I just need to get some thread and practice! I've been wanting to make a convertible Infinity dress for a while, but sewing stretch fabrics on my sewing machine was always tricky. I'm looking forward to mastering it, but I'm also nervous, (I seem to always feel this way before I dive into something daunting!)

I'm still rearranging things; before cleaning it, I had just thrown things into bins without much thought to keeping anything together. So I'm still consolidating like items together, and I find the more I do that, the more space I actually have! It's a nice feeling, I know I have plenty of extra storage room, for all of the craft supplies that will be going into it this new year! It was super tough to get a good shot of the whole room, it's so small! Hopefully, I'll have the details all cleaned up so I can post closer up pics. (I'm still clearing out some holiday suprises!)

3.1.07

WIP Wednesday

WIP Cable Experiment

Admittedly, I started my husband's Christmas present much too late to have it done on time. So, I'm still working on it. I don't knit very fast, although the new needles have definitely improved my pace. I'm trying to get things going though, I'd like to get a garment on the needles for myself soon.

It'll probably be the Blue Sky Alpacas mini skirt; my sister helped me get the right gauge before the holidays got really busy. I'm also contemplating having another go at the Razor cami, and Interweave Knits Prairie Tunic is also on my list to do. Don't even get me started with shrugs & wraps, though - I want to knit a Lady Eleanor, a Squiggle shawl, a turtleneck shrug/scarf and a One Skein wonder (with long sleeves!) Oh, and of course, there's the Clapotis! Oy… that's a lot of knitting, and I'm really trying to focus on my store this year!

WIP Cable Experiment (w/ flash)

Anyway, this scarf is just 10 cables without the border treatment, so they meld together to form this nice rippled texture. It was just sort of an experiment gone right, but I love it when that happens! It reminds me of a manly Clapotis, although maybe that's just my imagination! LOL! I also got a lovely new knitting tote from my husband (for my birthday,) the color is perfect, and it's just perfect for projects in progress.

The second pic was taken with a flash, and it shows the cables well. The texture they create makes seeing each line of them difficult. Oops! I almost forgot to mention, this is just 2 balls of Lion brand Microspun. I just added the second ball, so I'm about midway through.

2.1.07

Crafty Goodness!

Goodies from Shirley!

I received some awesome gifts this holiday season, and had to share! Shirley sent me a beautiful hat, gorgeous crochet earrings, an adorable tape measure and a to-DIE-for skein of Fiesta La Luz Multi silk yarn (in Alaska colorway, a lovely blend of purples and turquoise.) She also sent some chocolate goodies and some fruit leather; thanks again Shirley!

Birthday & Christmas roving!

From my sister came a set of Knit Picks Options interchangeable circular knitting needles. I LOVE these! They've sped up my knitting considerably! She also picked up a couple of the chunkier needles and a larger cable. She also gave me a copy of Scarf Style, by Pam Allen. I love the turtleneck shrug/scarf on the cover, it's so funky & fun! It has the Lady Eleanor wrap pattern, too; which I've been itching to try for a few weeks!

Malabrigo bag

She also got me 1/2 lb of roving; half from Fun With Yarn in awesome jewel tones. The second 4 oz is a pretty pastel blue, and I love them both! Thanks Jenn! She also spoiled me with a killer felted bag for my birthday - out of Malabrigo! It's a wide bag, so I'll need to add a little support to the sides to keep them from flopping in or out. I have a few ideas, I'm just working out what will be the most subtle option.

Books & other fun stuff

My Mom gave me a bunch of knitting magazines, Interweave Knits, Vogue Knitting and SelvEDGE; as well as an awesome Japanese beading book, and pretty aqua beads! She also gave me 5 balls of Knit Picks Suri Dream (in Ocean,) which I'm planning on using for a Squiggle shawl. Some non-crafty gifts included a pair of lovely Christmas ornaments, a super-soft (& strangely thin) scarf, and a lovely journal. Thanks Mom!

1.1.07

New Year's Sweets - Rice Krispy Treats!


Happy New Year! I still can't believe it's 2007 already! Anyhoo, I've been wanting to add recipes to my blog for a while; and these are my favorite treats! Be careful though, I can never eat only one, so they go super fast! LOL

You'll need:

6 cups Rice Krispy Cereal
1 pkg Marshmallows (16oz)
3 Tbs Butter
1/4 cup Peanut Butter
1/2 tsp Vanilla extract

Divide cereal in half, put one in large bowl (the other can be any size.) Grease pan (either 13x9 or 9x9.) Melt butter, peanut butter & marshmallows in microwave (or stovetop,) til just melted. Add vanilla & stir thoroughly. Pour onto cereal in large bowl, then add remaining cereal. Stir until cereal is evenly coated, this takes some muscle! When it's all mixed, pour into pan and flatten. You can use a roller or the back of a spoon, but be sure to grease it too, or it'll stick! Wait until they cool to cut, and enjoy!

21.12.06

Happy (early) Birthday to me!

Chocolate Caramel Cashmere Cupcake


For a while, I've seen Betz White's recycled sweater cupcakes around a bunch of different blogs. I knew I wanted to try it myself, and I had the perfect sweater laying around, just begging to be reconned into my very own cupcake pin cushion! A CASHMERE cupcake pin cushion! Chocolate caramel cashmere cupcake - to be precise! LOL Normally I'm more of a yellow cake kind of girl, but the sweater I started with was brown & tan, and it looks delicious anyway!

I'm off to try and clean a bit before tomorrow - my 26th birthday! I hate clutter, but I hate cleaning on my birthday even more! My husband & I are going to a wonderful restaurant in Lombard, The Capital Grille; and I'm very excited. We were there a couple of weeks ago with his parents, and loved it. I just need to try the white chocolate mousse this time. Mmmmmm.....

16.12.06

...not even close!

To being finished cleaning & re-organizing my craft room, that is. I must be crazy to have started the redo right before the holidays, but the choas was driving me crazy. I need order, and I'm not quite there yet. Sigh, I know I'll get it done, but I wonder, if I'll be able to manage it before Christmas, or if it will push right on through to the new year. Christmas is only a week and two days away, and my birthday's one of them. I wish this time of year didn't pass so quickly, but it seems to go quicker & quicker every year.

I hope to have new craft room pics soon, and I'll have fun Christmas goodies (after they're received!) Hopefully, cross my fingers, the weather around Chicago will stay nice, and I won't have to shovel another foot of super-wet & heavy snow! (Or maybe I should wish for a snow-blower? LOL) Happy Holidays, everybody!

13.12.06

Holiday Cheer!

It's easy for me to get over- whelmed this time of year, and this year I'm way behind on a lot of my projects. I'm also stressing, because most of what I'm working on are Christmas gifts; I don't have anything to post about, and fear that I might not until after the holiday! I guess that means I should just point out some fun holiday crafting cheer!

If you haven't seen them yet, go check out Hillary's Elf Stitchette embroidery patterns, they're super sweet! (Hillary is the amazing talent behind Wee Wonderfuls, and recently divulged that she's pregnant with her second child! Congrats & Good Luck with the morning sickness!)

I also love these button trees, I think I saw them first on Whip Up, and now there's a Flickr group full of them!

11.12.06

.:Tree Branch Earrings Tutorial:.

These are made with copper colored craft wire and genuine apatite beads.

whipupI've decided to enter these in this month's Whiplash contest - Gifts & Decoration. I wanted to wait & post pics of the first pair I made, because they're a gift for a special friend; but I didn't want to spoil a Christmas present (it's no fun to know ahead of time!) Good luck to all of the participants, and Happy Holidays, too!

Hand wired tree branch earrings would make a lovely Christmas gift! (Don't worry! They're super easy, and quick too!)

Materials you'll need:
28g wire
Briolette beads, or any kind you'd like
Small jump rings (optional)
Earring wires

Start by cutting a length of wire, between 18" - 24" (go longer if you want longer earrings, shorter if you prefer a more petite size.) Thread the largest bead onto the wire, and pull the 2 ends even. This doesn't have to be perfect.


Hold the wires between your fingers, close to the bead, and twist them together. The goal is to get a nice even twist, but be careful! Twist too much, and you run the risk of snapping one (or both,) of your wires. When you twist the wires together, try and balance them, instead of wrapping one wire around another. Holding the wires in a "V" while you twist will help achieve a balanced twist. This will form the lowest hanging branch.


Next, take another bead (I used increasingly smaller beads, as I wired them, you're working from the bottom towards the top,) and thread it onto one of the wires. It doesn't matter which wire. Move it close to the first bead, and then play with the spacing, until you get a result that pleases you. Pull the loose end back up to the other wire, and hold there.

Twist the second branch into place, remembering not to twist too tightly! I find that odd numbers of branches look more organic than evens, and that asymmetry also makes them feel more branch-like. (Basically, if they're perfect, they won't look like real tree branches, so little irregularities are a good thing!)

The rest of the beads follow the same way, I used smaller beads, and gave them smaller branches each time, to lend a realistic feel. You can wire whatever kind of beads you want, into almost any shape you want.

To finish, I simply twisted about 2 " past how tall I wanted the earrings to be. Bend on a circle shape (I used a double-pointed knitting needle, sz2) and wrap the end around the stem. Clip closely (see below for picture of clipped & bent ends,) and fold the ends as close to the stem as you can, with pliers, if you have them. I added a jump ring to the first pair I made, but it's not a necessity though. Attach to the ear wires, and you're done! Easy peasy, and oh so pretty!

I'd love to hear comments & suggestions, I'd be happy to help if you need it!


Creative Commons License
This work is licensed under a Creative Commons Attribution-NonCommercial-ShareAlike 2.5 License.

9.12.06

Ack!

Even though I've gotten a little better about posting regularly, I still totally missed yesterday; and I was planning on posting the earring tutorial. Sorry guys! I should have it ready on Monday. For some strange reason, I decided the Holidays would be the perfect time to re-organize my craft room. Ha! Ok, so I knew the timing was bad anyway, but I couldn't stand the chaos any longer. I just had to do something about it. So, the tutorial is actually all written, I just have to go back and get all the pictures taken, and put them in an order that makes sense. Hopefully by the end of next week, I'll have the room clean enough to post about again, too! I loved seeing other people's craft rooms in the Flickr pool!

6.12.06

Tree Branch Earrings

When I was little, my family and I vacationed on a wonderful lake in Michigan. We had a cute little bluff cabin, it had the most amazing view. I never got to stay in the front bedroom (the adults had first dibs,) but it had 2 walls of windows, and the sunrise was incredible coming up over the lake & the hills. I'll never forget it, but I'm glad I have a very good visual memory of what it looked like, because it was sold & demolished several years ago. It was so sad to be so forced into letting something go, but it really proved to me that everything changes, and you just have to be grateful for the time you get.

I'm grateful that I can still remember what the fireworks looked like from the middle of the lake; and the awesome little secret passage from the kid's bedroom to the bathroom. It went through the back of the closet, and wasn't very secret, but I loved it anyway. The town's called Beulah, but it's not the same anymore, either. Lots of money to build lots of big houses meant the small town charm faded. I'll never forget it, though; the smell of ripe wild raspberries and the cool breezy forest hikes. Another Michigan treasure is Gwen Frostic, a wildlife artist who owned a print shop near Beulah (she's since passed, but her work is carried on by her children.)

It was a yearly treat to go into the print shop, we got note cards, stickers, framed prints, books and really anything else they'd print on. The shop was as close as I've ever seen to nature come straight indoors. Tree branches on every wall, windows to the outside forests and prints of nature covered the walls, and the large printing machines were showcased in the front. They were always going, and I can recall staring for what felt like hours. Every detail was so cared for, even the book paper had deckled edges, and it looked so organic. If you like nature, check out the website, I absolutely LOVE her prints!

I've been very inspired by nature lately, even though the Chicago weather's cold & snowy! I saw this concept in a very high end jewelry catalog, and knew I could replicate it with materials more in my budget. Although I have long dreamed of being able to use tourmaline, sapphire, gold & all sorts of expensive supplies!

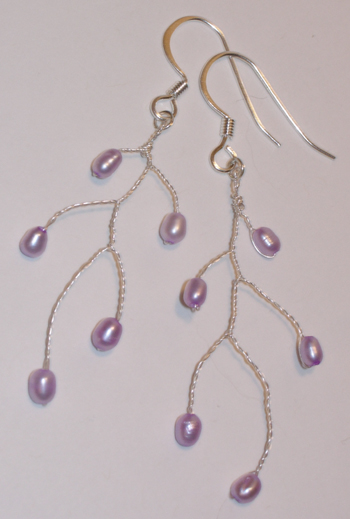
These earrings were totally easy peasy to make, and I'll be posting a tutorial soon! You can use any wire/beads you want, from colored craft wire & plastic beads, all the way up to gold wire and gemstone beads. These are fine silver wire with lilac freshwater pearls.

4.12.06

My sewing machine

It seems another trend going around the crafty blogs lately - showing off your sewing machine! Of course, I had to get in on it; I love my current machine! It's a Husqvarna/Viking 6460, and probably older than I am! But it's a workhorse, and it's never let me down, (unlike my first machine, a cheap plastic Husky star, that died within 18 months of purchase.) It's all metal, and probably 30-40 lbs, I don't tend to move it very much though. I use the metal casing to my advantage, sticking every little doodad right at hand, with magnets!


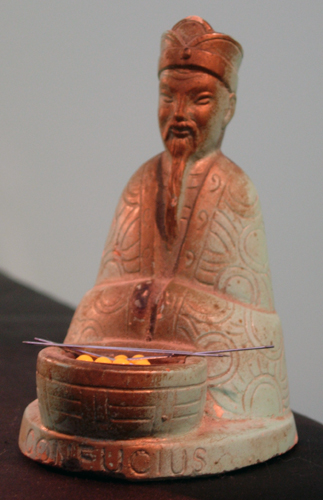
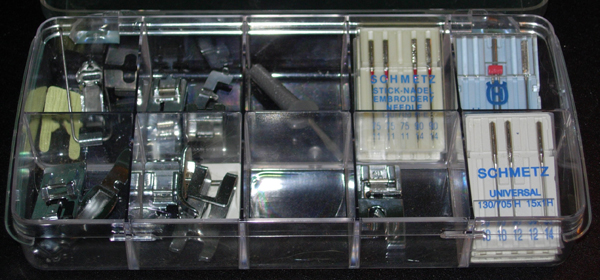
I found it on Ebay, and I looked for this particular model, because it's what my Mom's been sewing on my whole life. (Her's is 1970"s brown, though - LOL!) And, coincidentally enough, my twin sister has a Viking 6400 series as well. Great minds think alike! :P I use a vintage incense holder for all my broken or damaged sharps (needles & pins.) It's Confucius! I use a small plastic divided container to hold all of my machine parts, presser feet, needles, and anything else I might need to sew.

Recently, I heard a rumor that Viking isn't manufacturing out of Sweden anymore, so I'd caution potential new buyers to review newer model's performance. My machine is 20+ years old, and (knock on wood!) is still sewing strong!

30.11.06

Where, oh where can this fabric be?

I'm just dying to find this fabric!

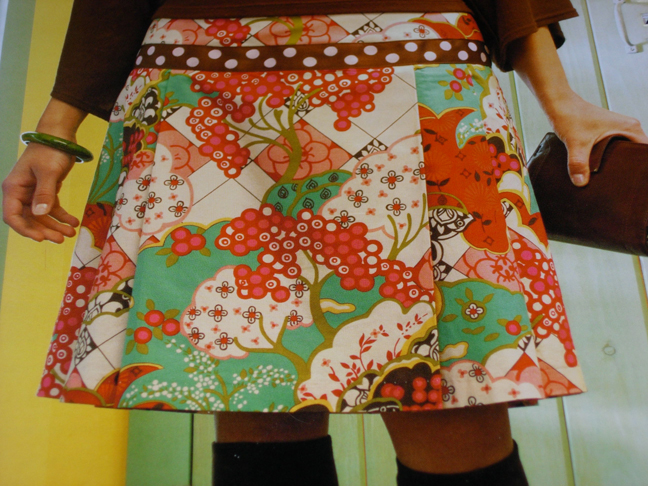
It's featured in the Asian Dream skirt in Sew What! Skirts, and I ADORE it! I've been looking and looking, and I can't seem to track it down, can anybody help me? (The polka dots are trim, and not part of the motif.)

It's actually slightly blue-er, and the red is more pink, really. If anyone can find it for me, I'll swap nearly anything for it!

Kool Aid Dyed Yarn

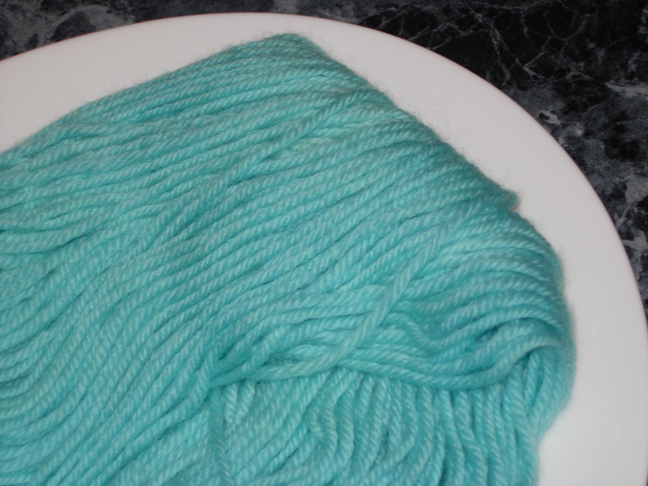
This is the final result - yeay robin's egg blue yarn!

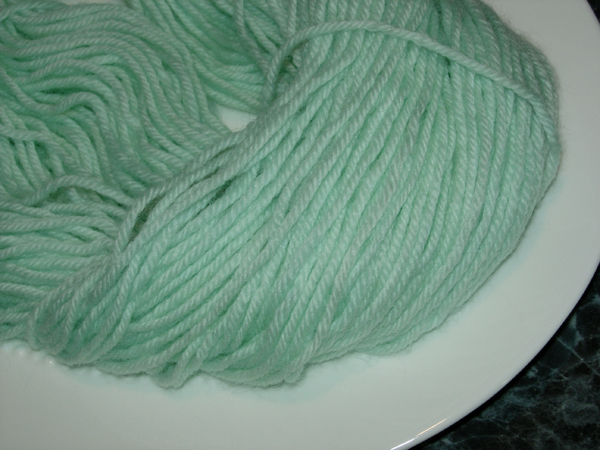
Alright, so I'm obsessed with robin's egg blue, have been for 3+ years now! I still love purple (my first favorite color,) but I knew I had to try for robin's egg, since it's so hard a color yarn to find. I started with Lion brand Wool in cream. For my first try I only used one packet of Ice Blue Raspberry Kool-Aid, and it turned out slightly more minty green, and less robin's egg blue than I wanted. No matter, just dye, dye again! LOL

Here's the color after the first round of dyeing.

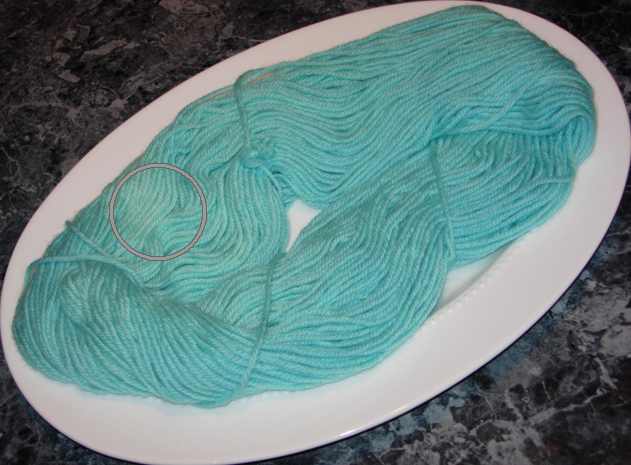
I couldn't find another packet of Ice Blue Raspberry to save my life, so I tried Berry Blue next. I should have probably only used half of the packet, but oh well! It's a very vibrant robin's egg blue, is all! LOL It does have some lighter areas (which I was hoping to avoid,) but I don't want it any more blue, so I'll live with it. I'd encourage anybody to try it, it's lots of fun! Be careful of dyeing your hands, though! The area circled didn't absorb as much dye as the rest, and stayed lighter.

Here's the whole skein layed out, after 2 rounds of Kool Aid dyeing.

LinkWithin

Related Posts with Thumbnails